How to Setup Payroll Custom View
Payroll Custom View lets you give a staff member limited payroll access, restricted to a specific list of employees. This guide shows you how to create the role, assign it to a staff member, and configure the payslip whitelist.
-
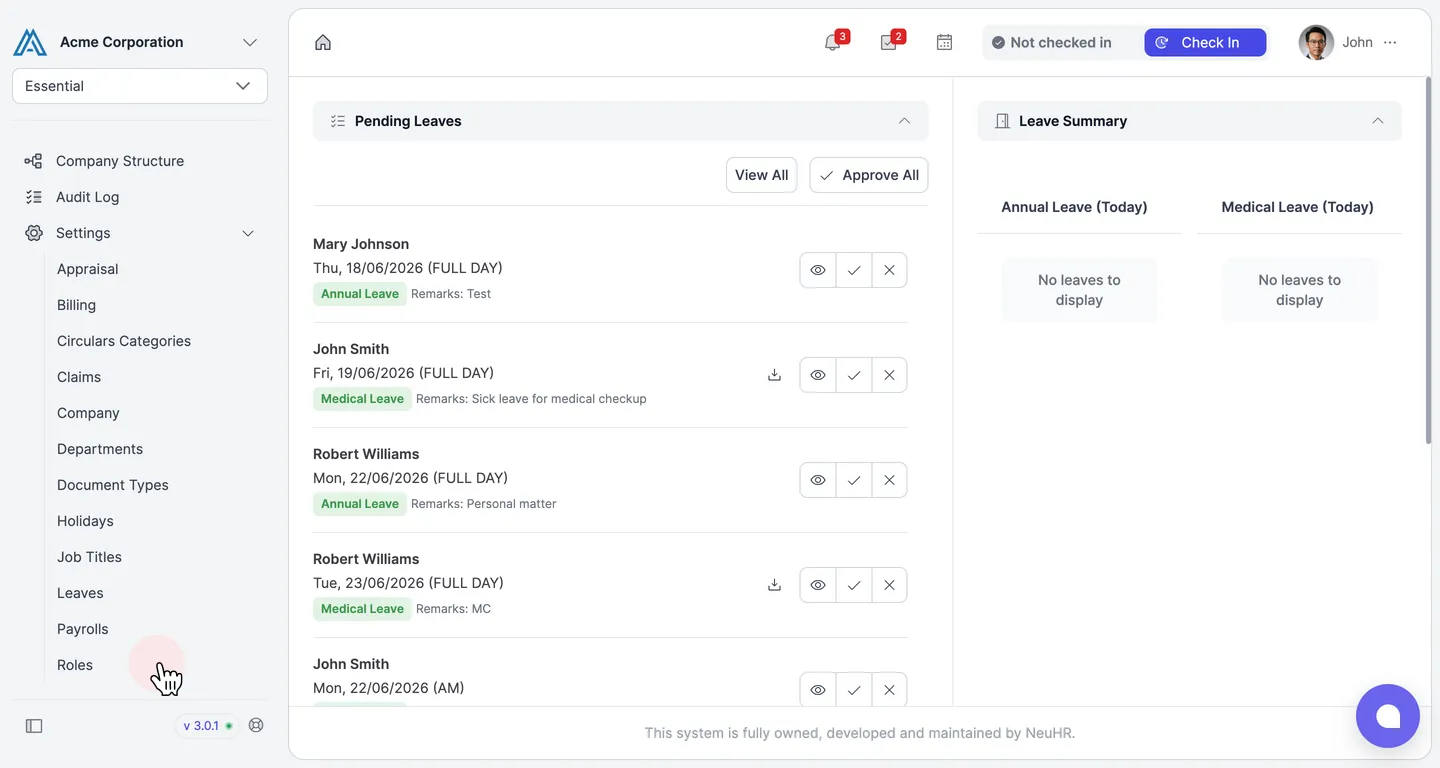
Open the Roles settings
Section titled “Open the Roles settings”From the left sidebar, click Settings to expand the menu, then click Roles.
-
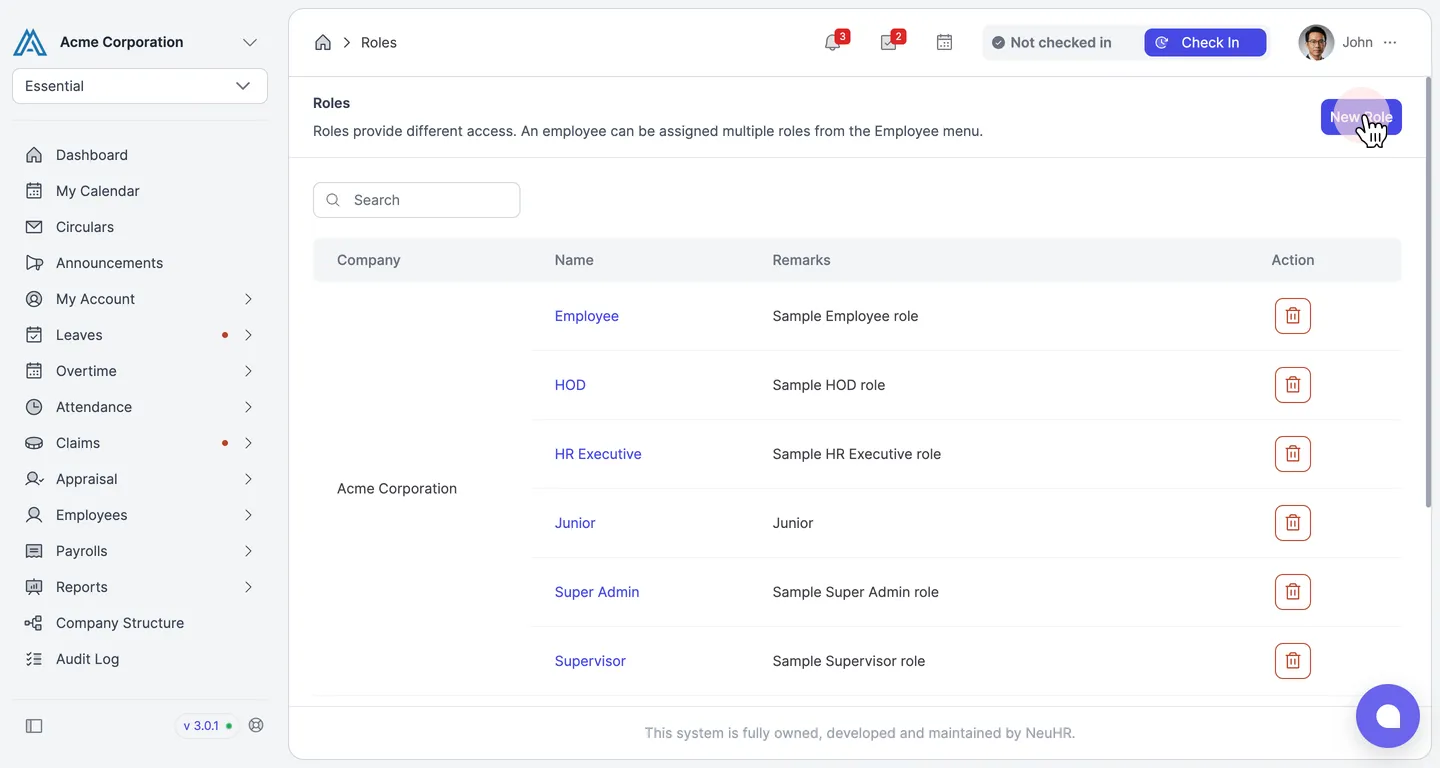
Click New Role
Section titled “Click New Role”On the Roles page, click New Role in the top-right corner.
-
Enter the role details
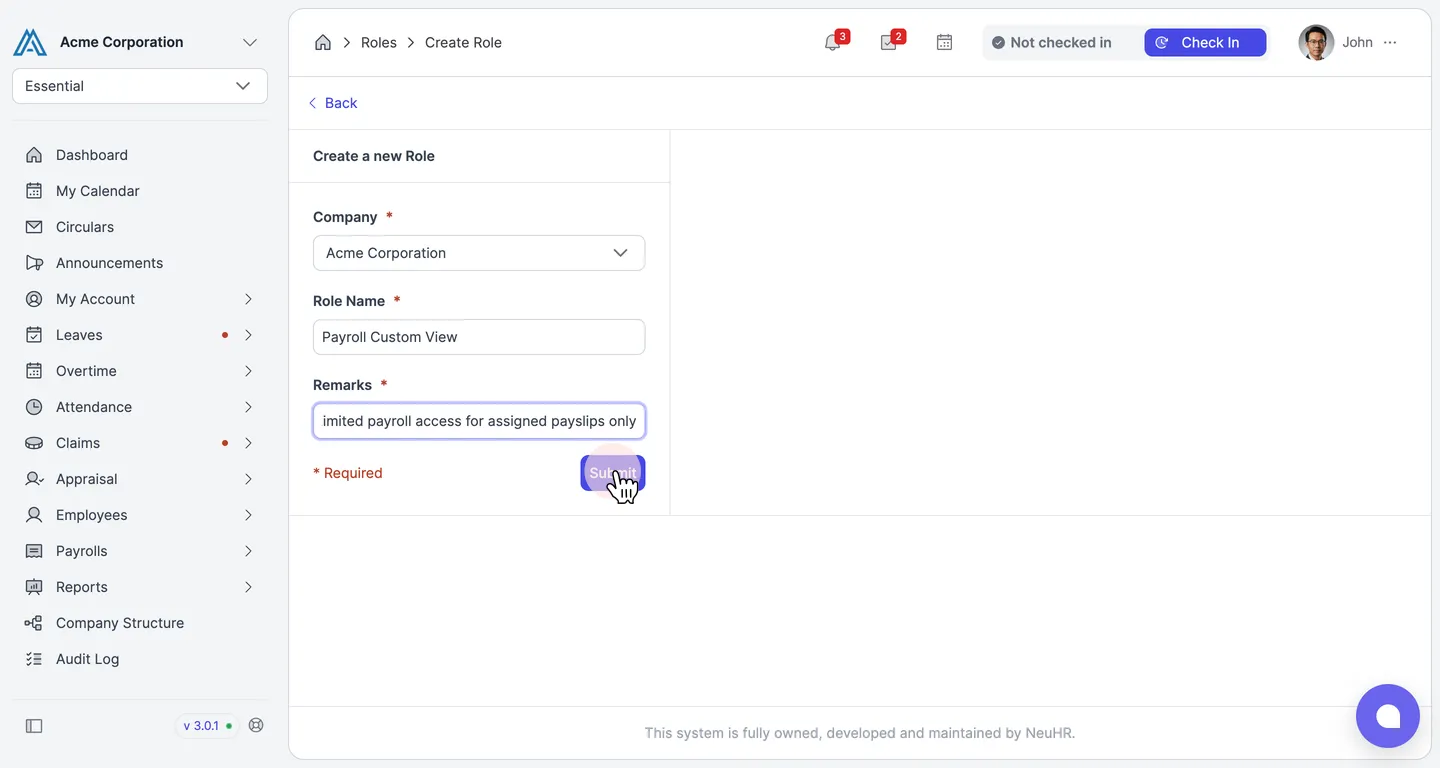
Section titled “Enter the role details”On the Create a new Role form, fill in the following fields:
- Company: The company the role belongs to
- Role Name: Enter
Payroll Custom View, or any other clear, descriptive name - Remarks: A short description of what the role is for
Click Submit to create the role.
-
Open the new role
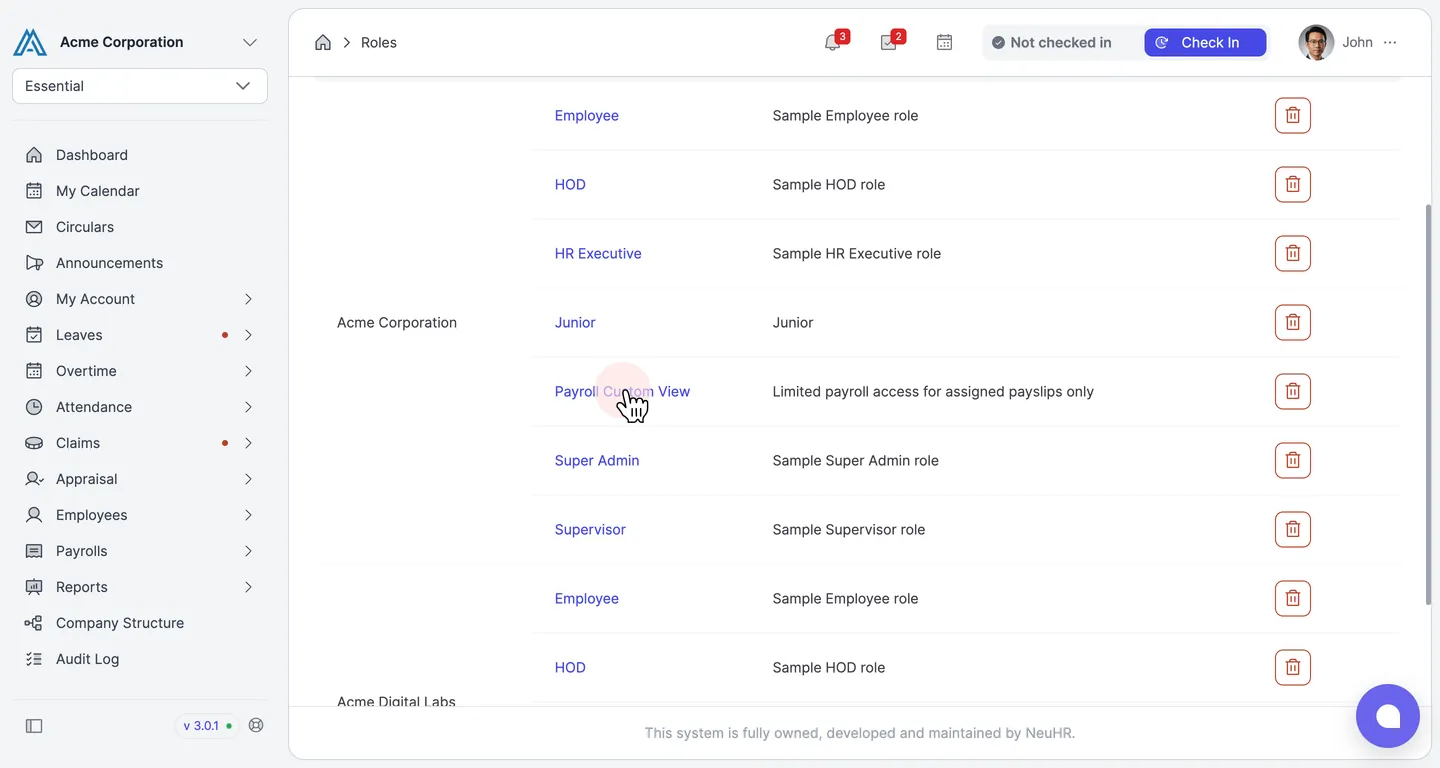
Section titled “Open the new role”You’ll return to the Roles page with your new role listed. Click Payroll Custom View in the Name column to open it.
-
Select the Custom View Access permission
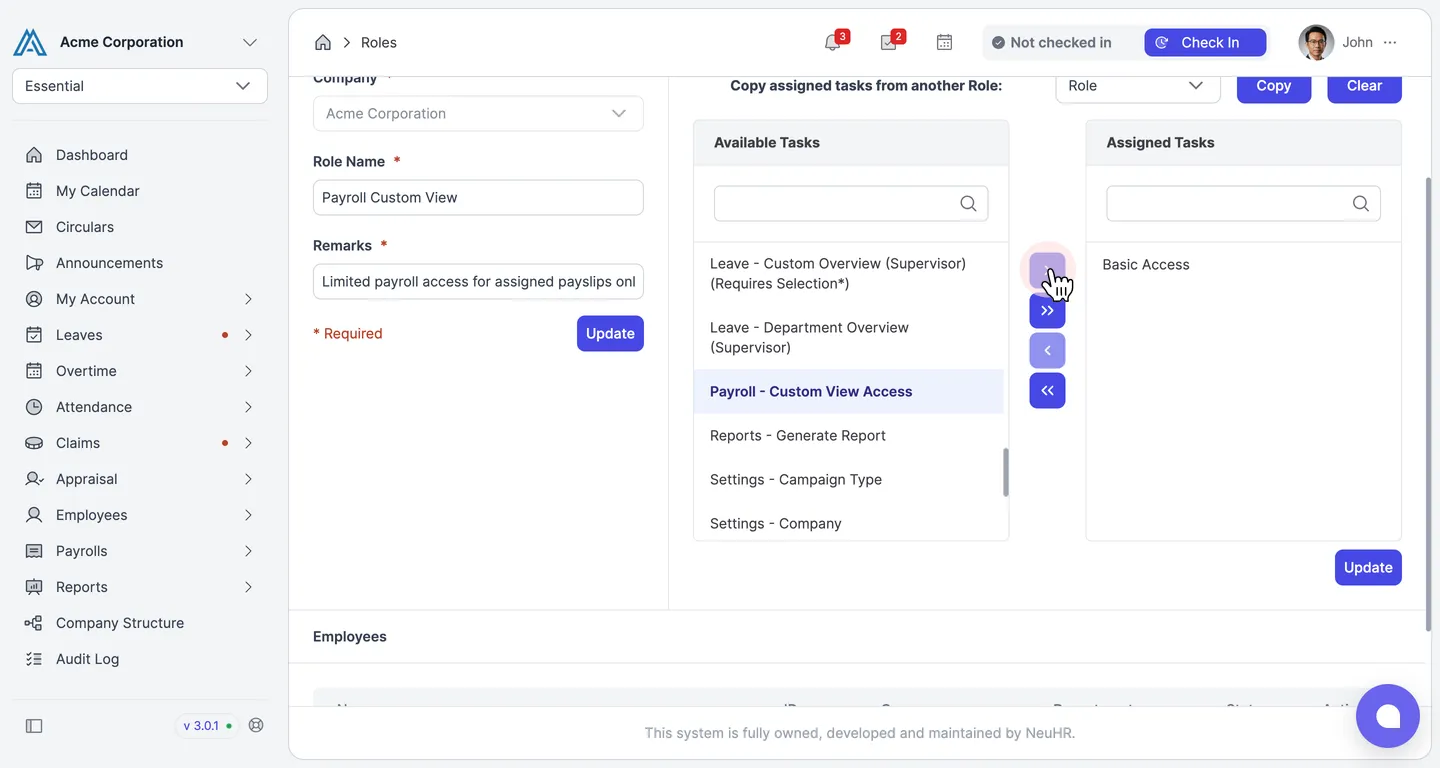
Section titled “Select the Custom View Access permission”Scroll to the Role Permission Mapping section. In the Available Tasks list, click Payroll - Custom View Access to select it, then click the › button to move it across.
-
Save the permission
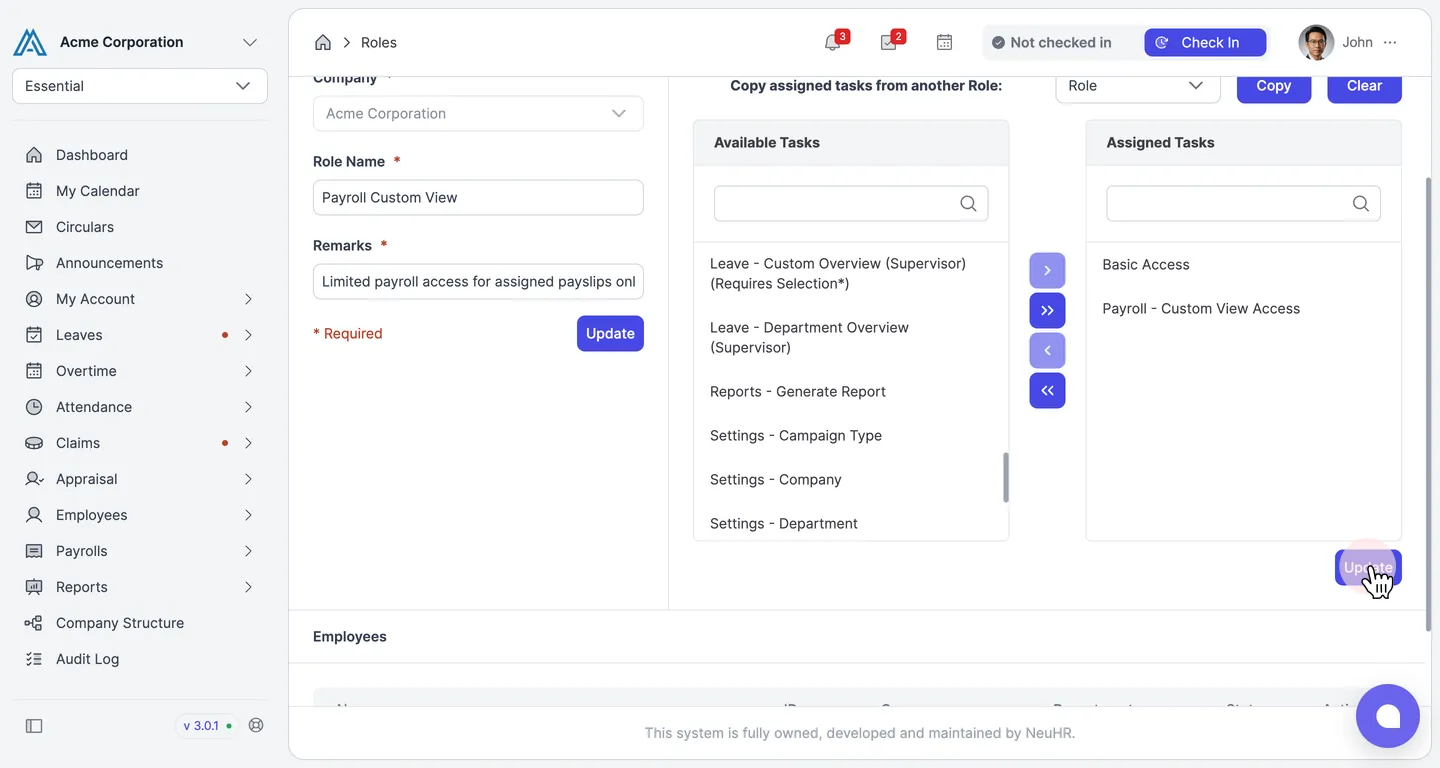
Section titled “Save the permission”Payroll - Custom View Access now appears in the Assigned Tasks list. Click Update below the lists to save the permission mapping.
-
Open the Employees list
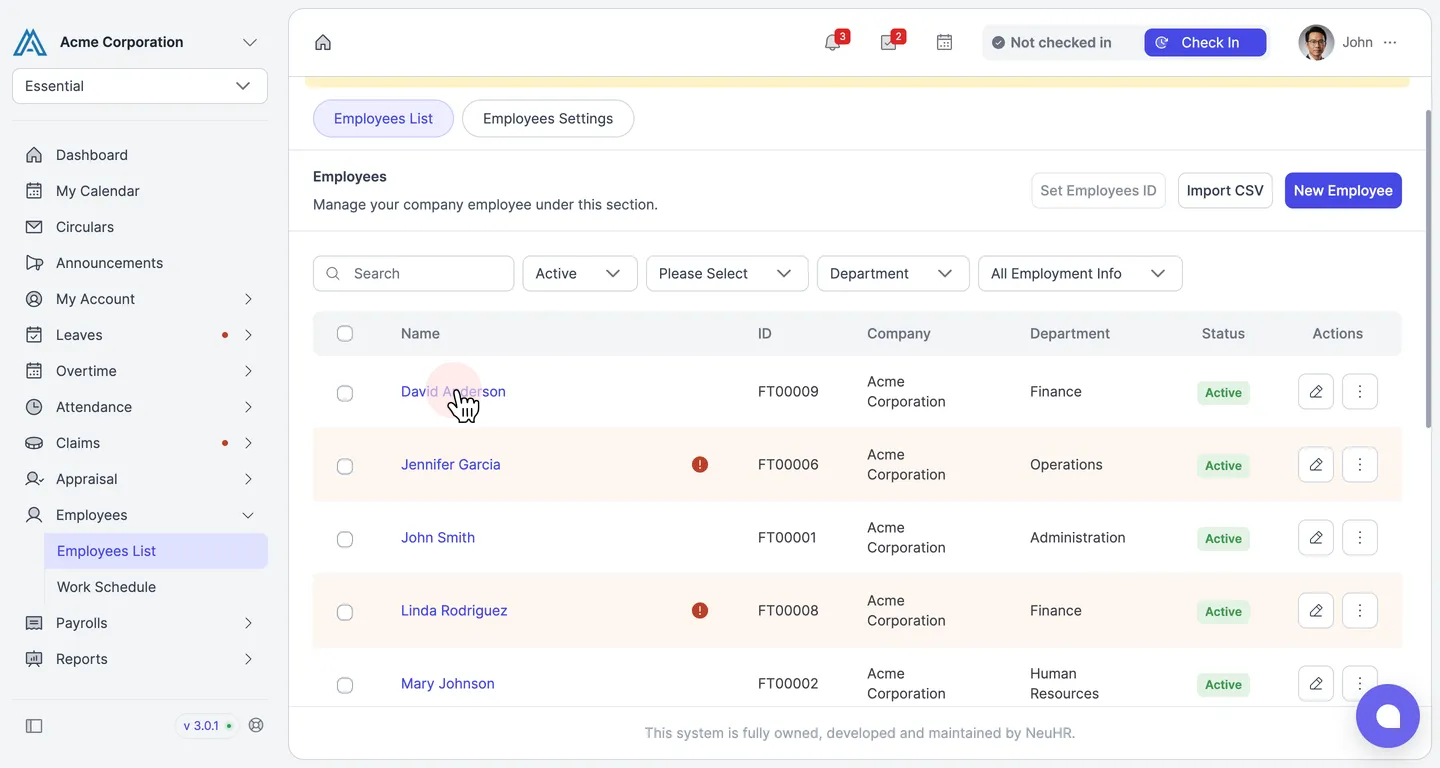
Section titled “Open the Employees list”From the left sidebar, click Employees, then select Employees List. Click the name of the staff member you want to grant payroll access to.
-
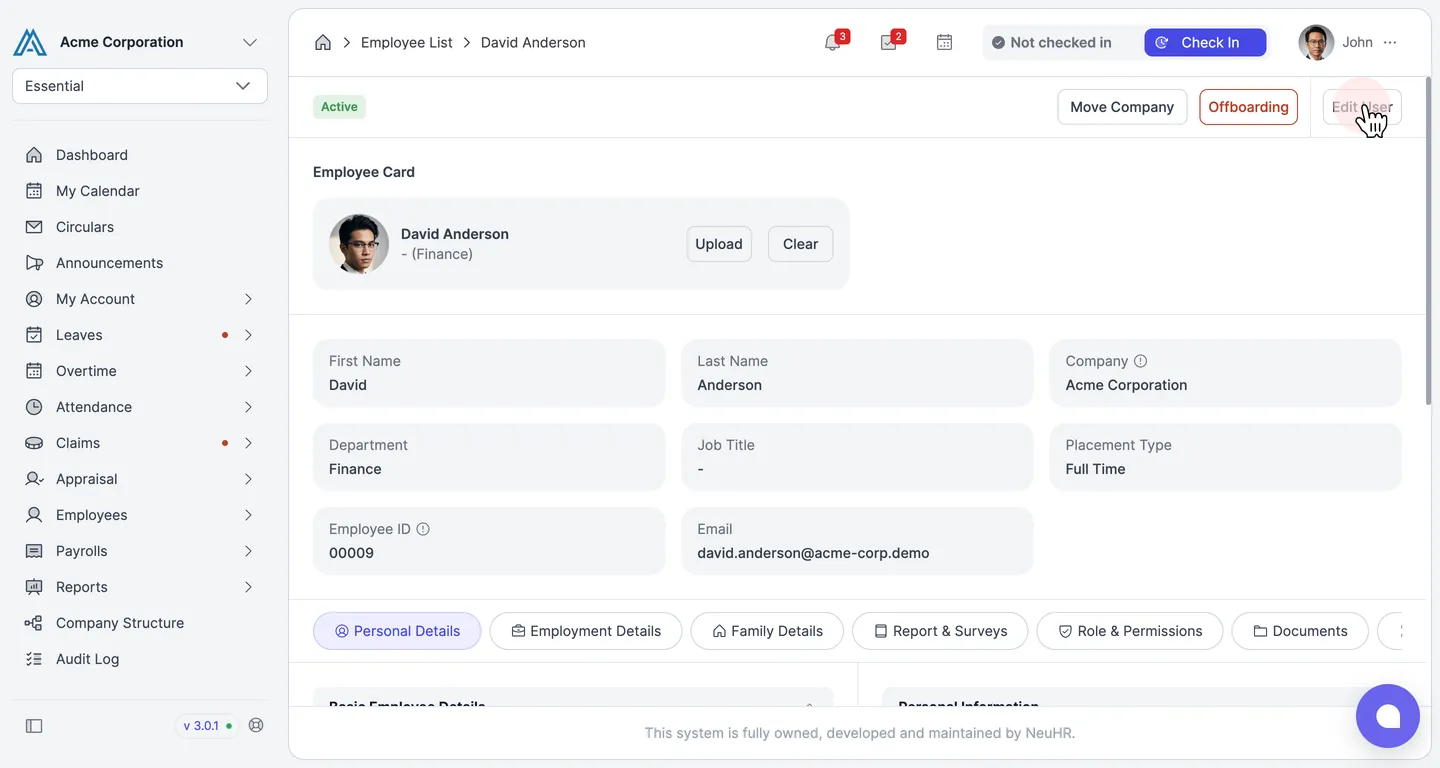
Click Edit User
Section titled “Click Edit User”On the employee profile, click Edit User in the top-right corner to enable editing.
-
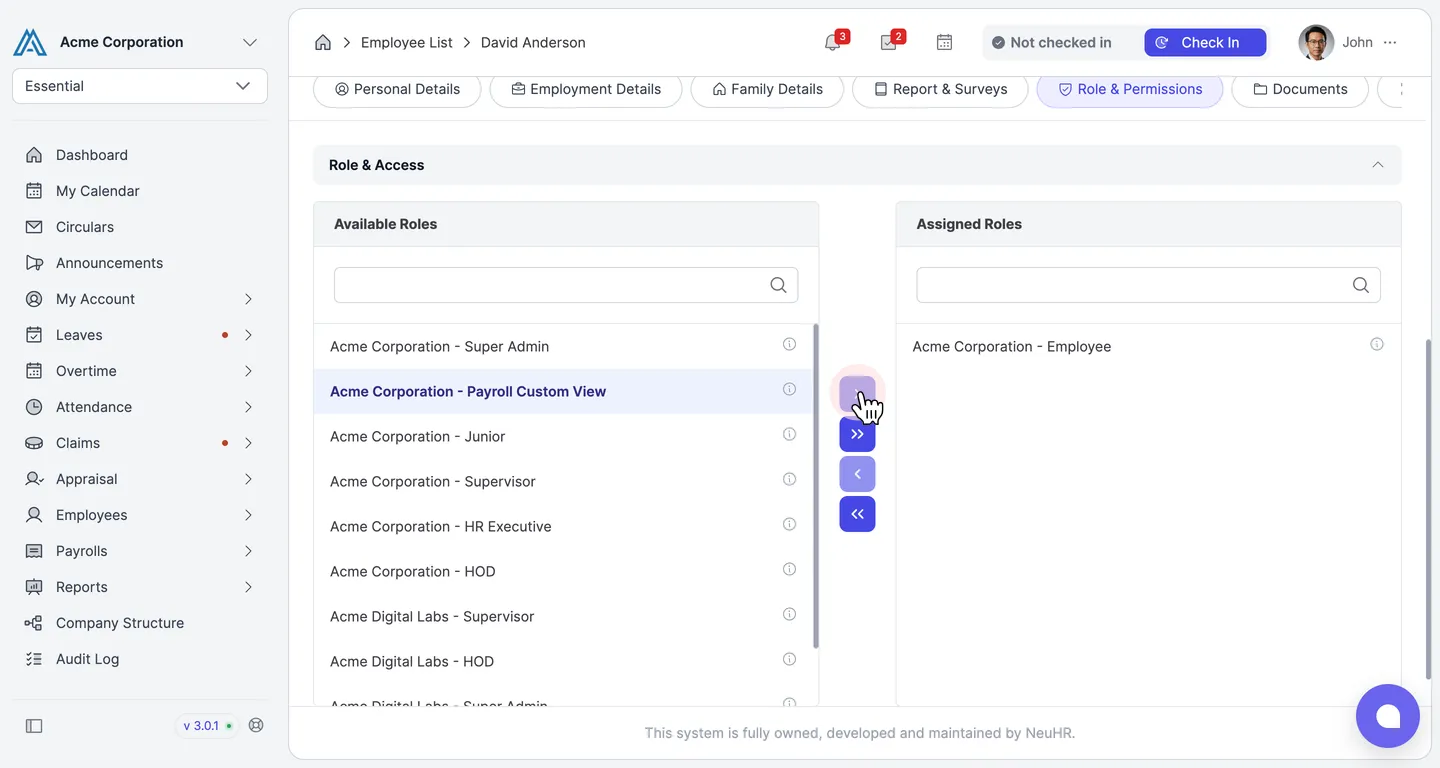
Assign the role
Section titled “Assign the role”Open the Role & Permissions tab. In the Available Roles list, click the new role — shown as Acme Corporation - Payroll Custom View — to select it, then click the › button to move it across.
-
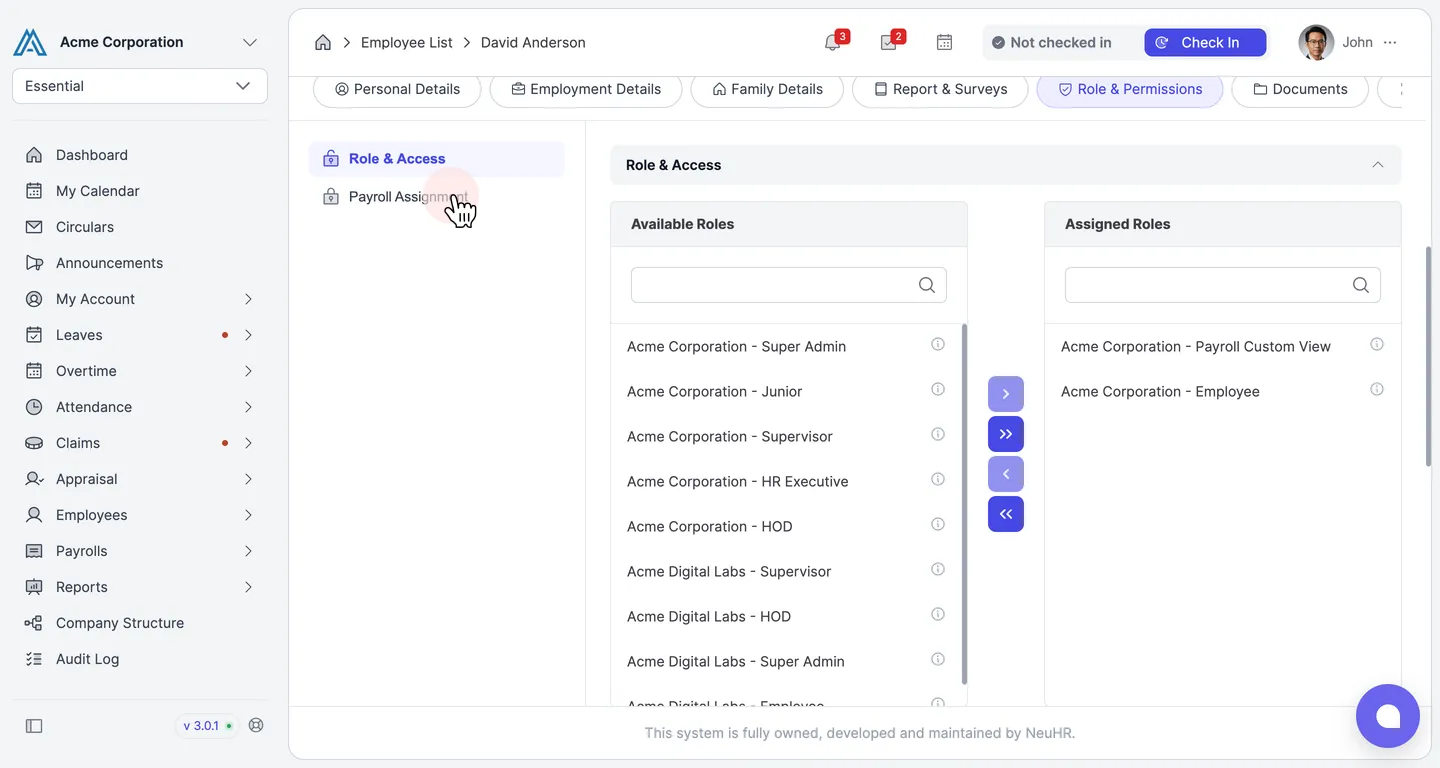
Open Payroll Assignment
Section titled “Open Payroll Assignment”The role now appears under Assigned Roles, and a Payroll Assignment section becomes available. Click Payroll Assignment in the left panel.
-
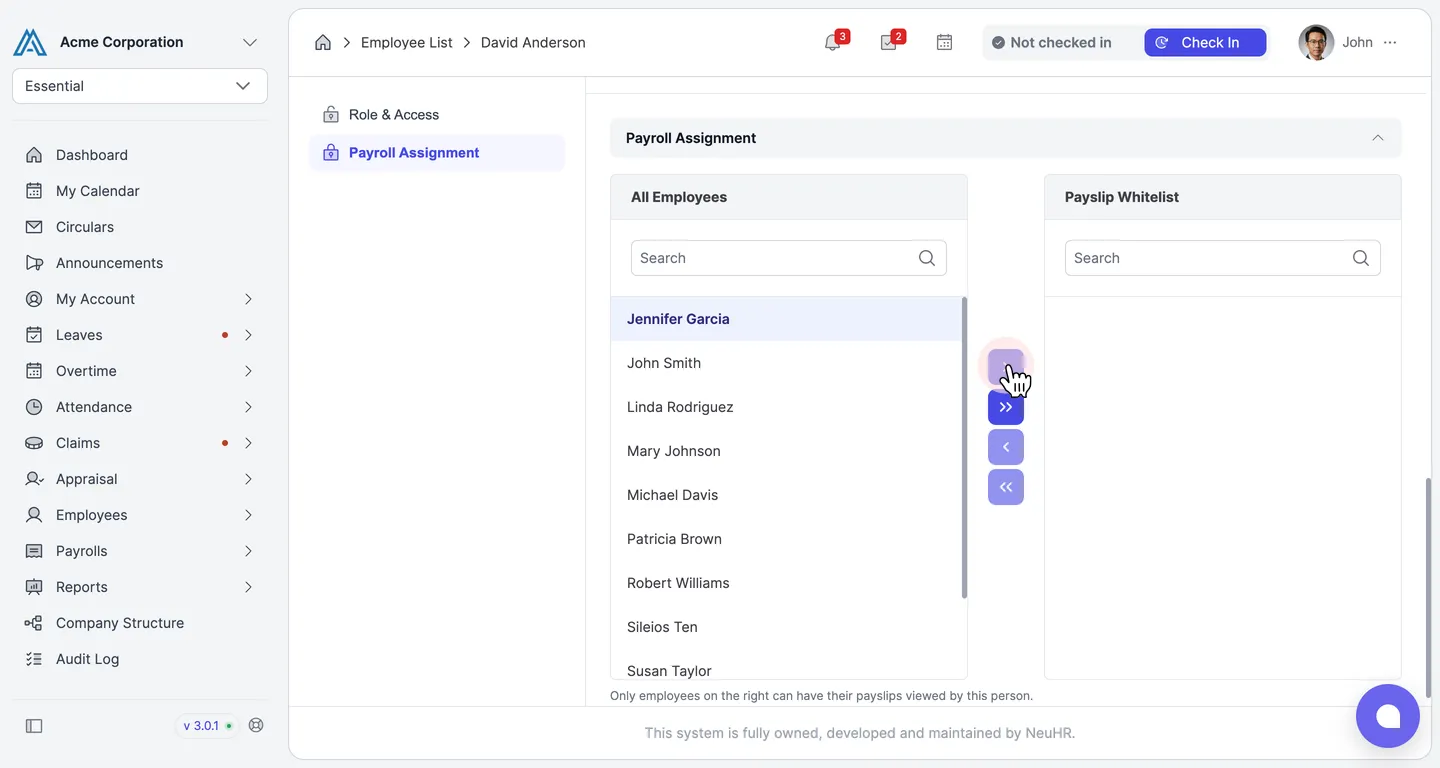
Select employees for the whitelist
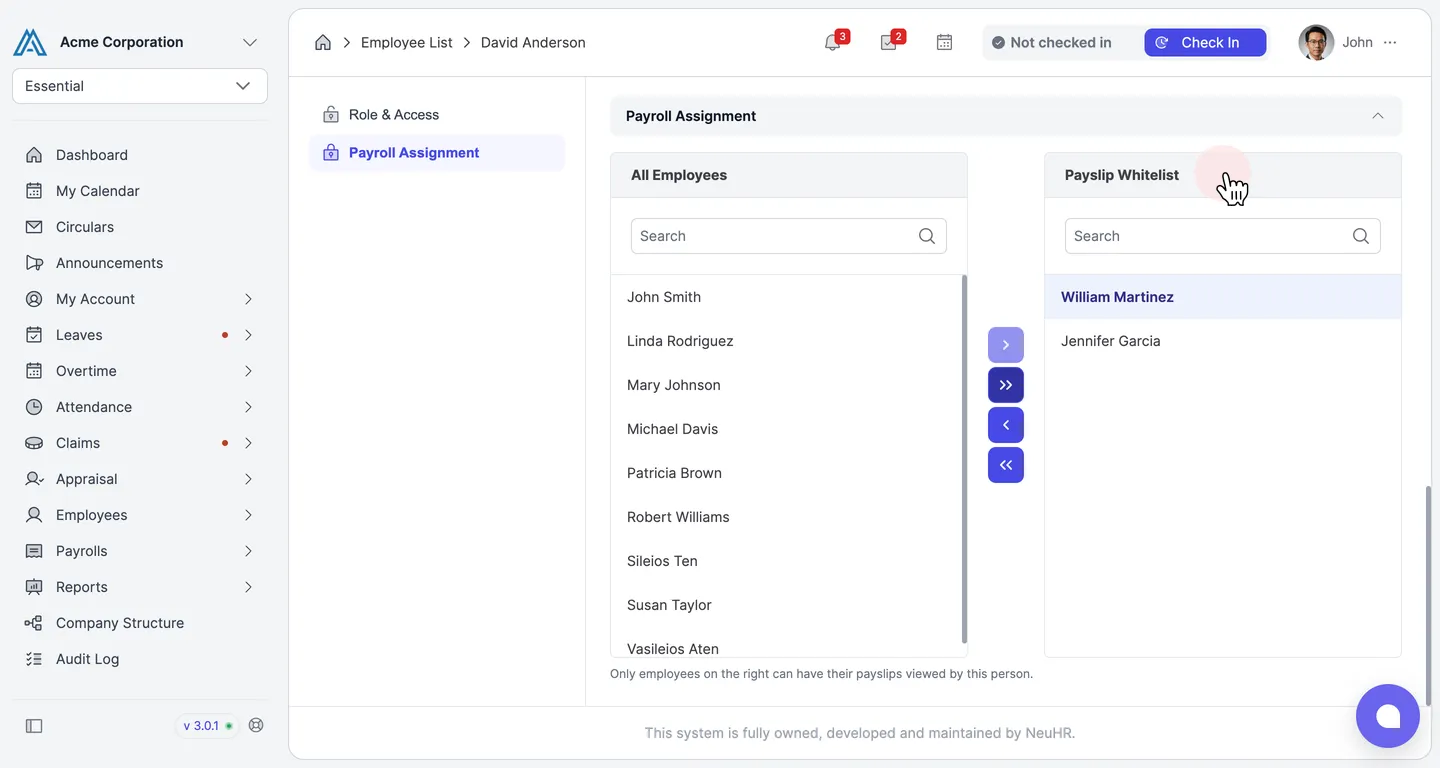
Section titled “Select employees for the whitelist”In the All Employees list, click an employee to select them, then click the › button to add them to the whitelist. Repeat for each employee this staff member should have payroll access to.
-
Review the Payslip Whitelist
Section titled “Review the Payslip Whitelist”The selected employees now appear under Payslip Whitelist. As the note below the lists explains, only employees on the right can have their payslips viewed by this person.
-
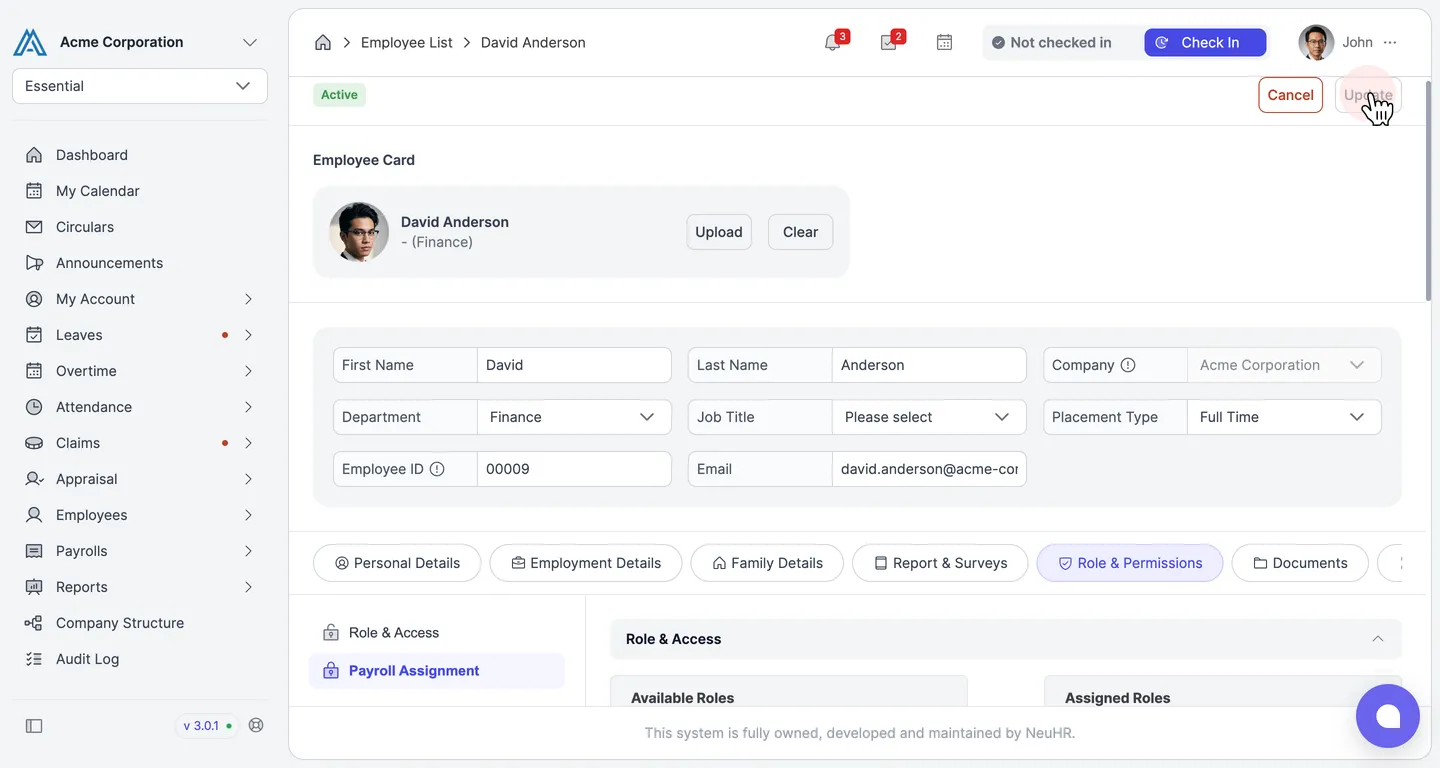
Save the assignment
Section titled “Save the assignment”Click Update in the top-right corner. You’ll see a success message: “Employee updated successfully”.