How to Update the Leave Settings
This guide will show you how to update the leave settings in NeuHR. Leave settings control how leave balances are managed, including automatic resets, encashment options, proration rules, and resignation-related configurations.
Prerequisites
Section titled “Prerequisites”- You must have HR Executive or Super Admin role
- Access to the Leave Settings in the admin panel
Step 1: Navigate to Leave Settings
Section titled “Step 1: Navigate to Leave Settings”From the main dashboard, click on Settings in the left sidebar, then select Leaves from the dropdown menu.
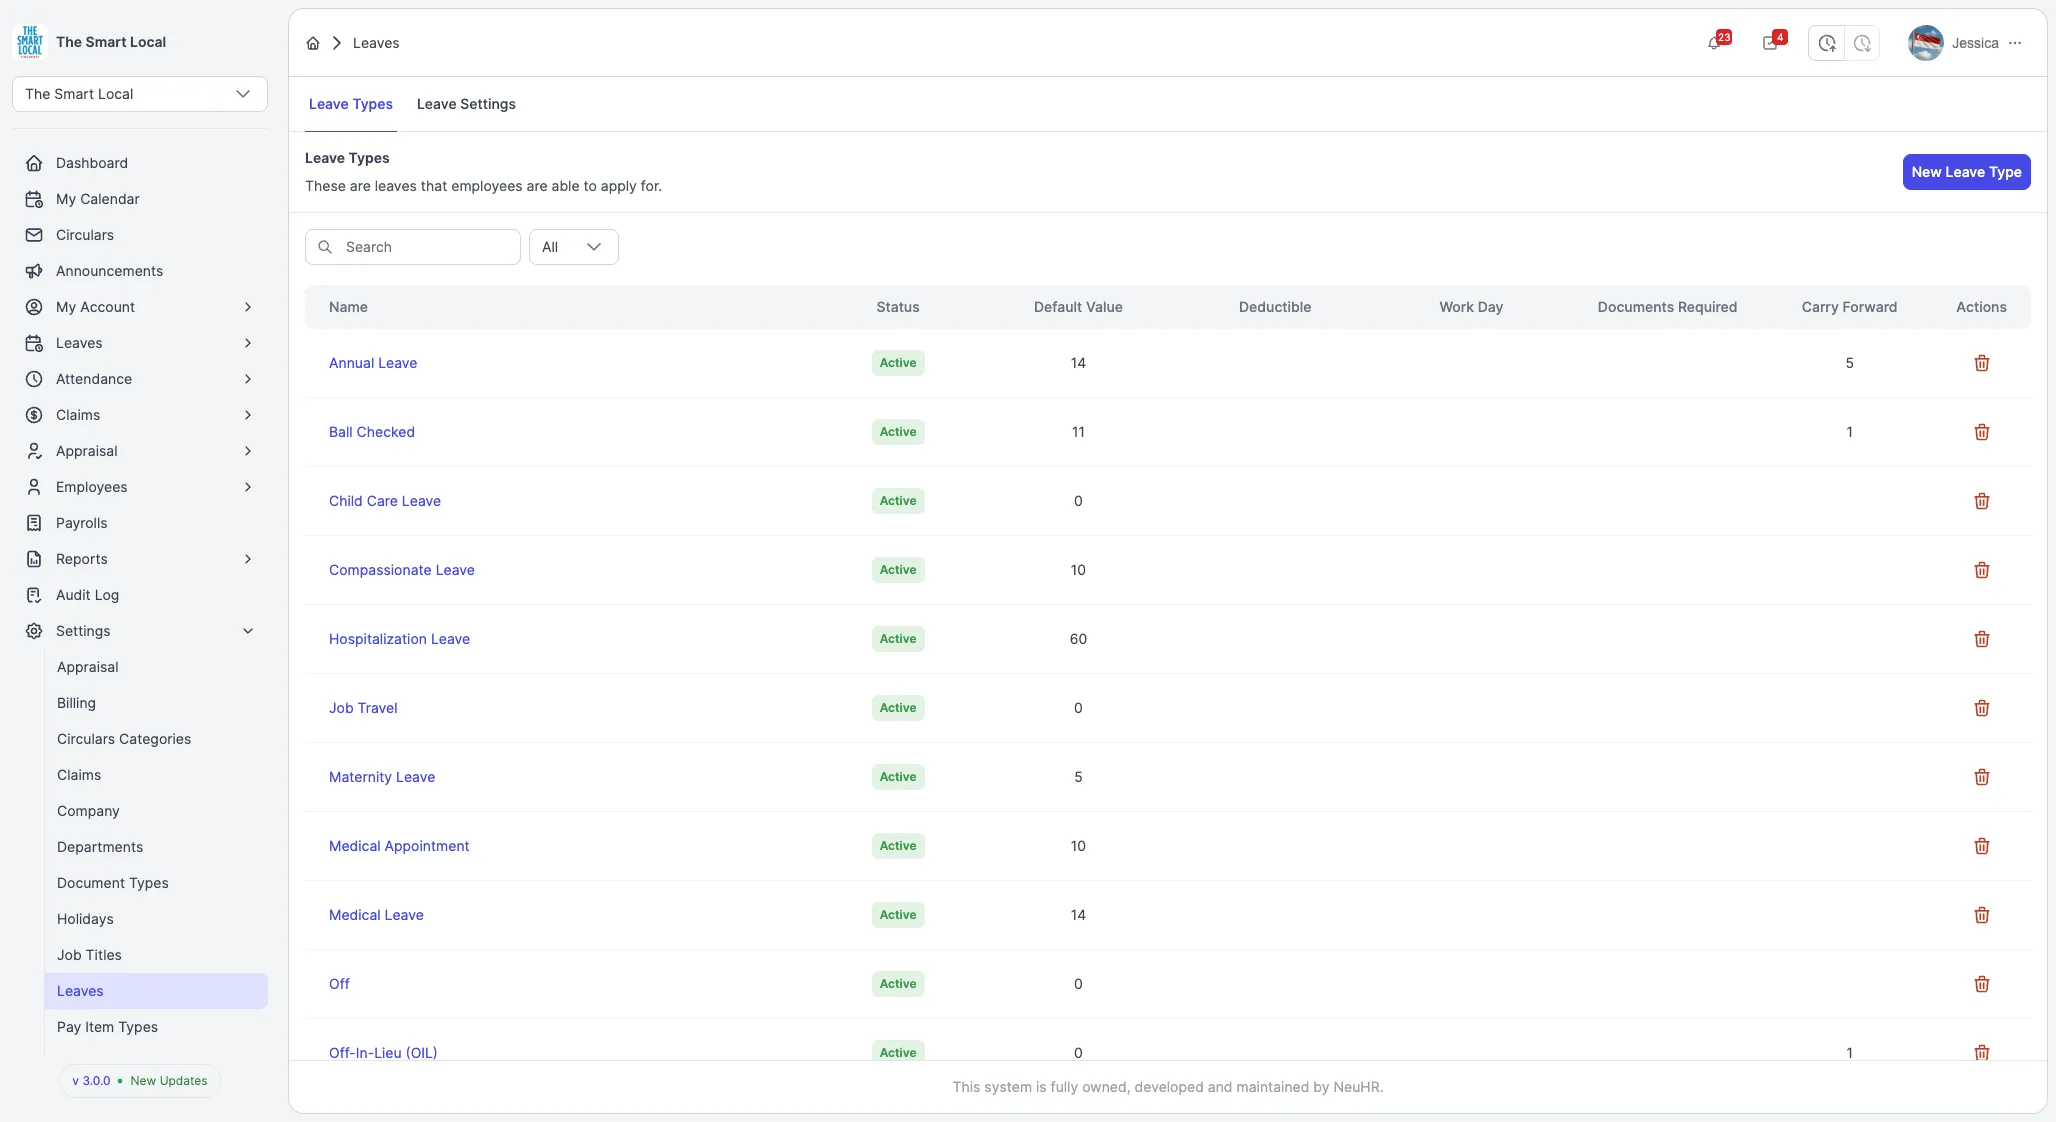
Step 2: Click Leave Settings Tab
Section titled “Step 2: Click Leave Settings Tab”On the Leaves page, click the Leave Settings tab in the top navigation menu.

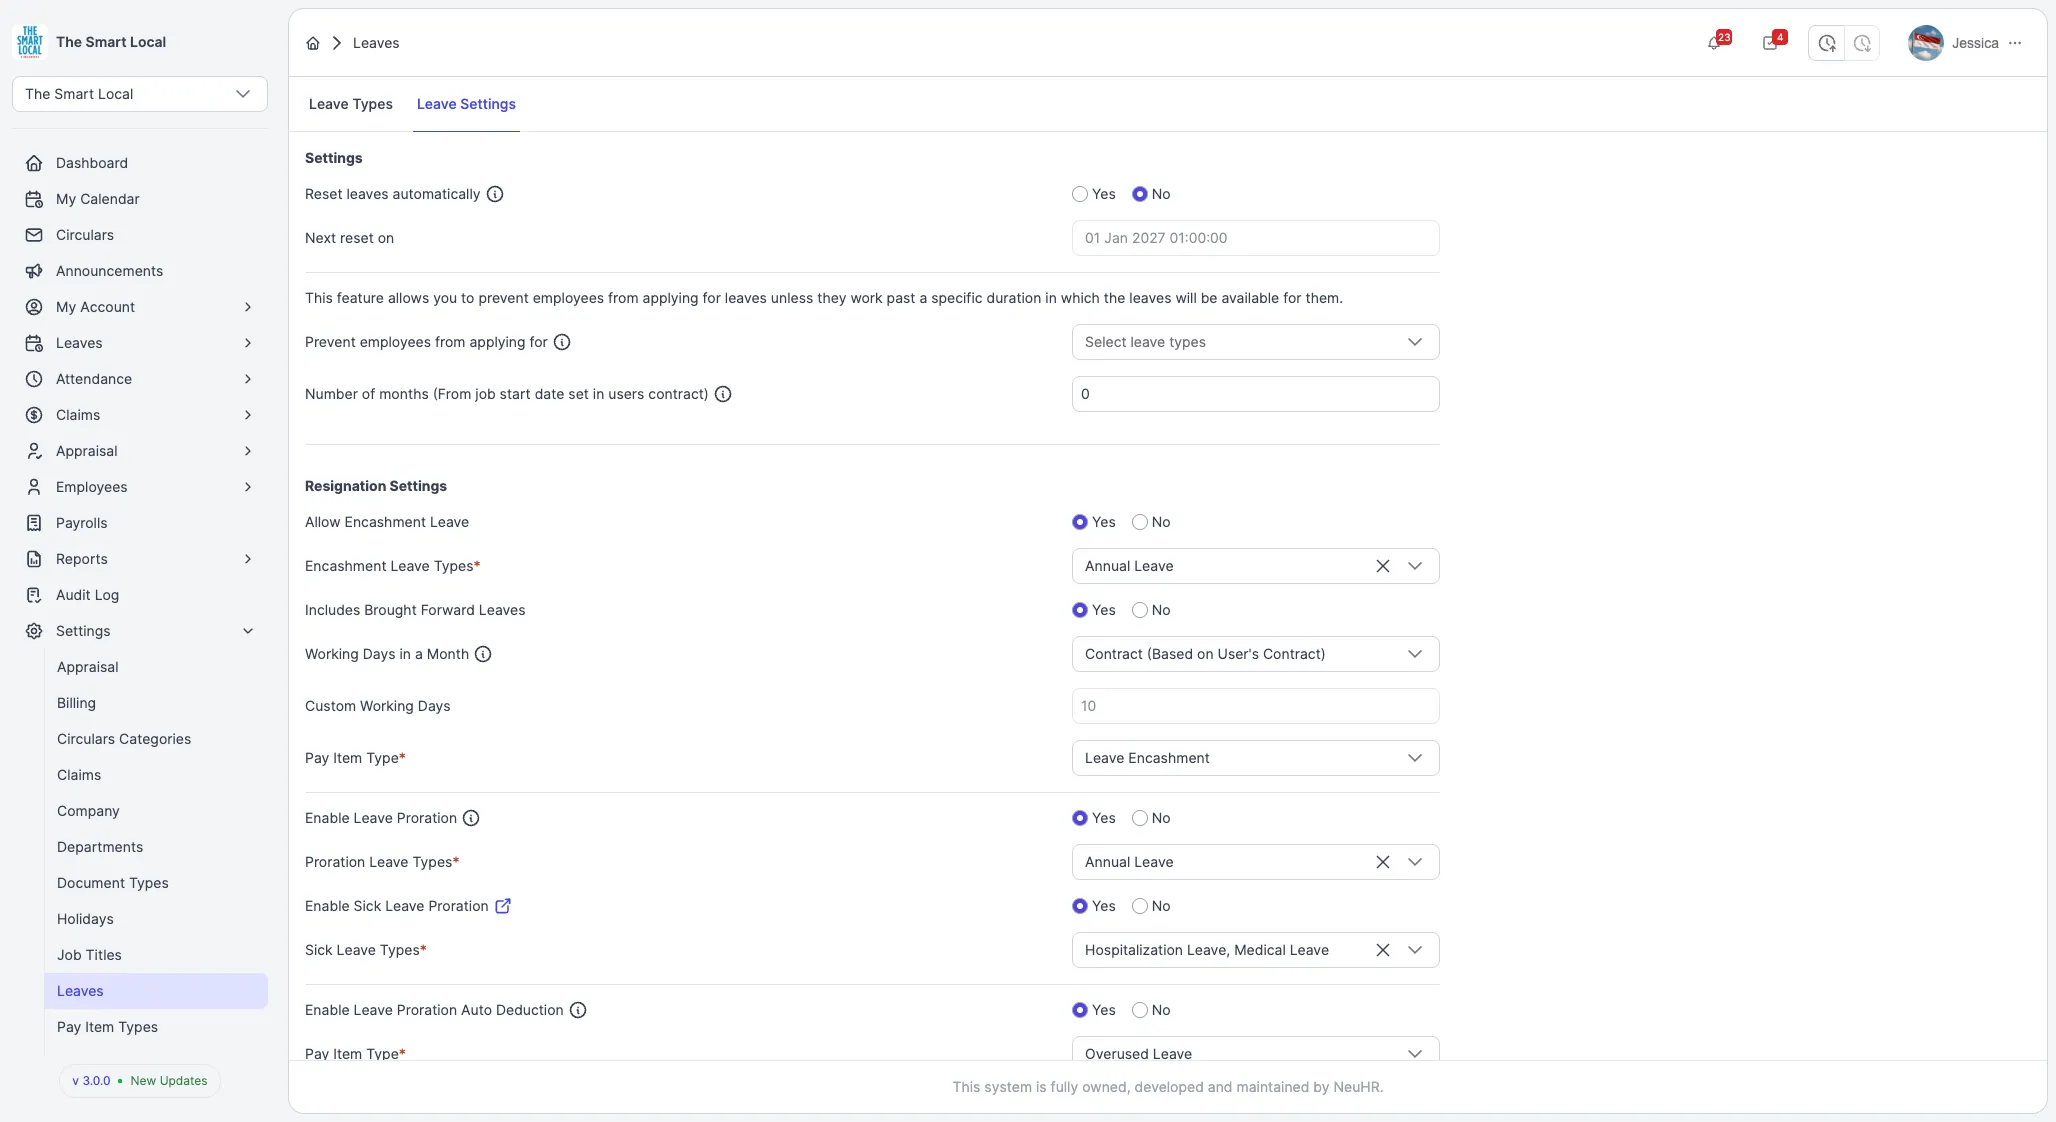
Step 3: Configure Leave Settings
Section titled “Step 3: Configure Leave Settings”Update any of the following settings according to your company’s leave policy:
Automatic Reset Settings
Section titled “Automatic Reset Settings”- Reset leaves automatically: Choose whether to automatically reset leave balances
- Yes: Leaves will reset automatically on the specified date
- No: Leaves will not reset automatically
- Next reset on: View or set the next automatic reset date (only available when automatic reset is enabled)
Leave Eligibility Settings
Section titled “Leave Eligibility Settings”Configure waiting periods before employees can apply for certain leave types:
- Prevent employees from applying for: Select specific leave types that require a waiting period
- Number of months: Set the number of months employees must work before they can apply for the selected leave types (calculated from job start date in employee contract)
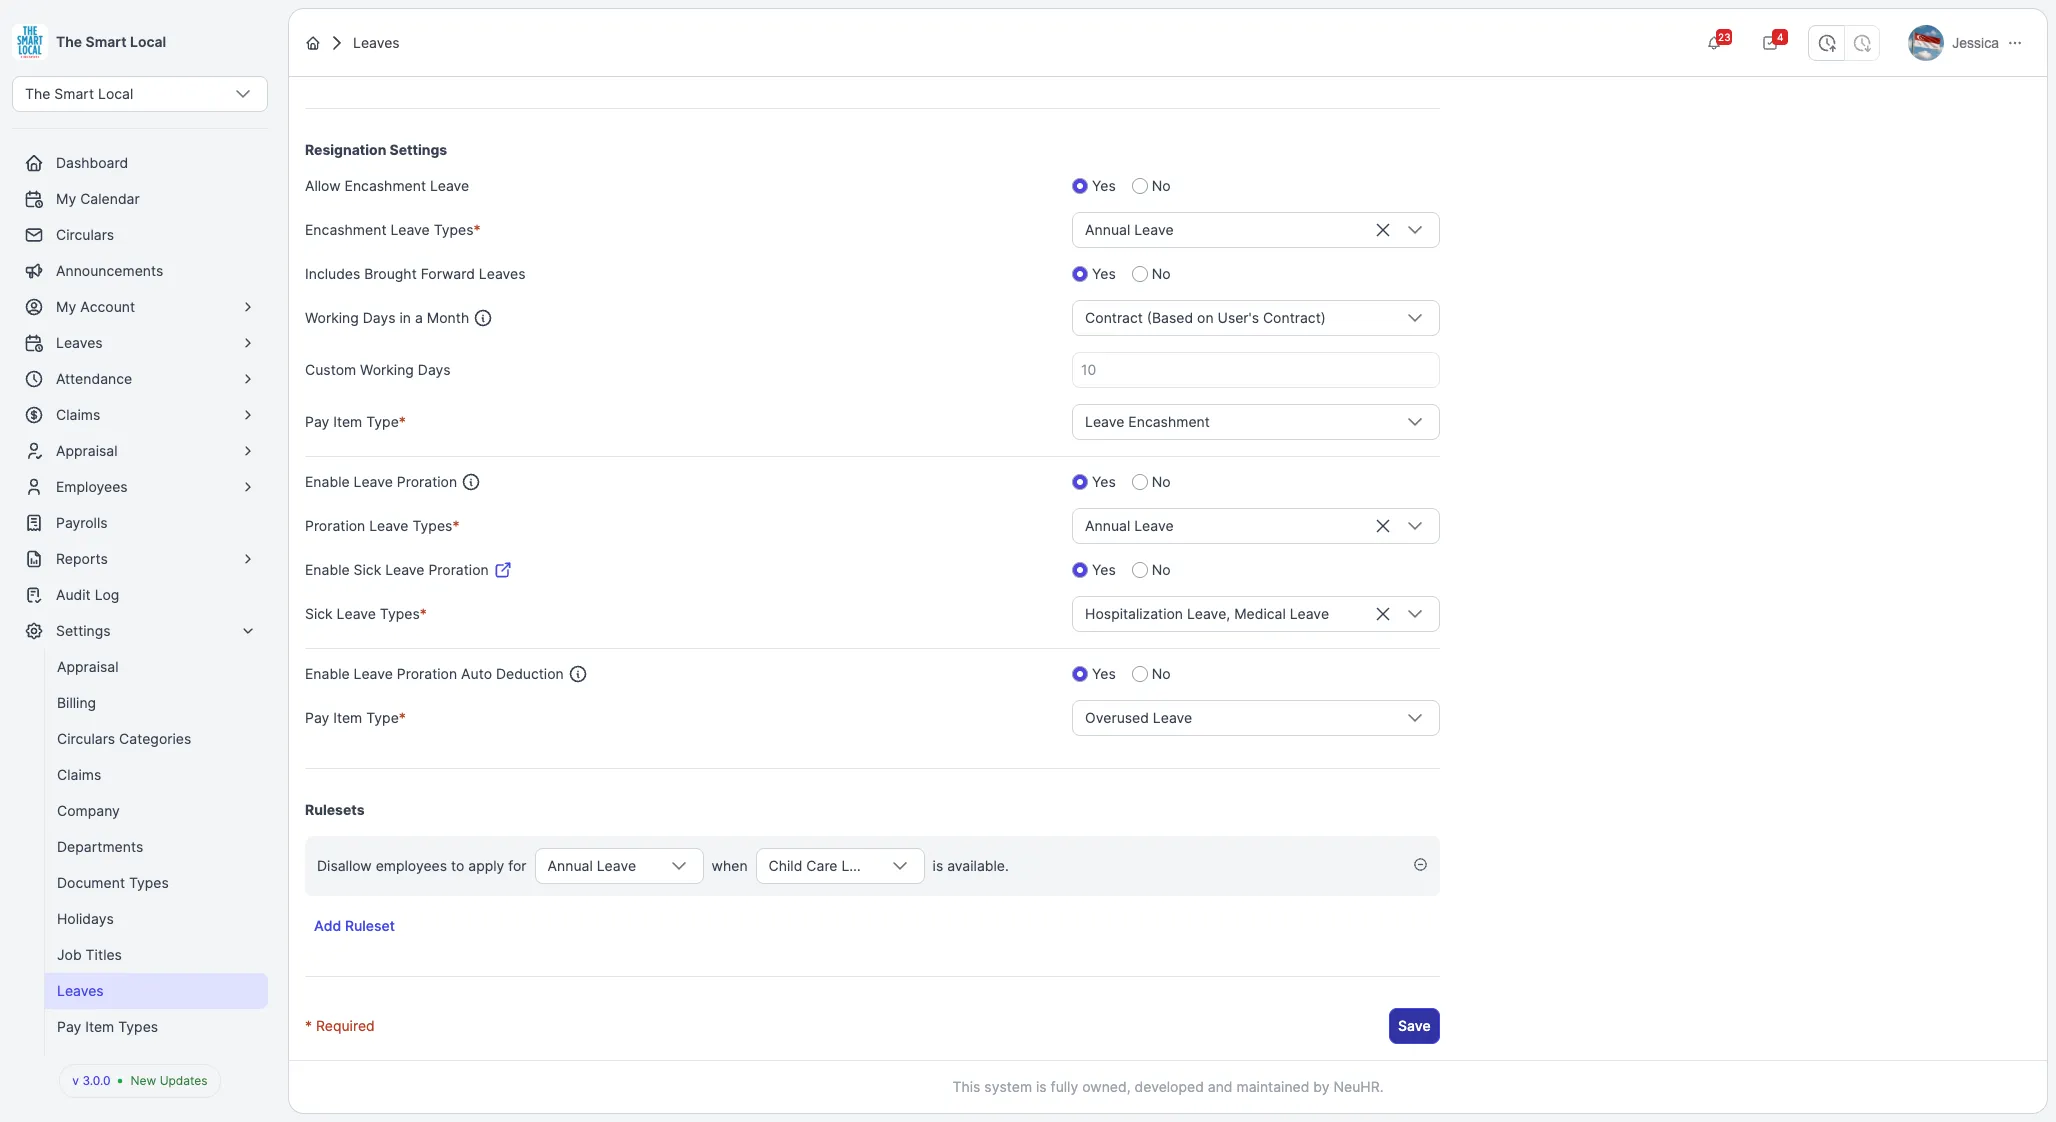
Resignation Settings
Section titled “Resignation Settings”Configure leave handling when employees resign:
- Allow Encashment Leave: Choose whether to allow encashing unused leave
- Encashment Leave Types: Select which leave types can be encashed
- Includes Brought Forward Leaves: Choose whether to include brought forward leaves in encashment
- Working Days in a Month: Select calculation method (Contract-based or Custom)
- Custom Working Days: Set custom working days if not using contract-based calculation
- Pay Item Type: Select the pay item type for leave encashment payments
Proration Settings
Section titled “Proration Settings”Configure leave proration for employees who join or resign mid-year:
-
Enable Leave Proration: Choose whether to prorate standard leave
- Proration Leave Types: Select which leave types should be prorated
-
Enable Sick Leave Proration: Choose whether to prorate sick leave (refer to MOM guidelines)
- Sick Leave Types: Select which sick leave types should be prorated
-
Enable Leave Proration Auto Deduction: Choose whether to automatically deduct overused leave from final pay
- Pay Item Type: Select the pay item type for overused leave deductions
Rulesets
Section titled “Rulesets”Create custom rules to restrict leave applications based on other leave availability:
- Disallow employees to apply for: Select a leave type that should be blocked
- when: Select the leave type that, when available, triggers the restriction
- Click the Add Ruleset button to add more rules

Step 4: Save Changes
Section titled “Step 4: Save Changes”After making your changes, scroll down and click the Save button at the bottom of the page.
Step 5: Verify Success
Section titled “Step 5: Verify Success”The system will display a success message: “Leaves settings saved successfully” confirming that your changes have been saved.
Your leave settings are now updated and will apply to all leave calculations and workflows in the system.