Step-by-Step Guide on Filling Employee Creation/Update Form
The employee form is divided into four tabs — Personal Details, Employment Details, Family Details, and Report & Surveys — plus a shared header section at the top. This guide walks through every field in each section.
Fields marked with a red asterisk (*) are required before you can publish the employee’s account.
-
Navigate to New Employee
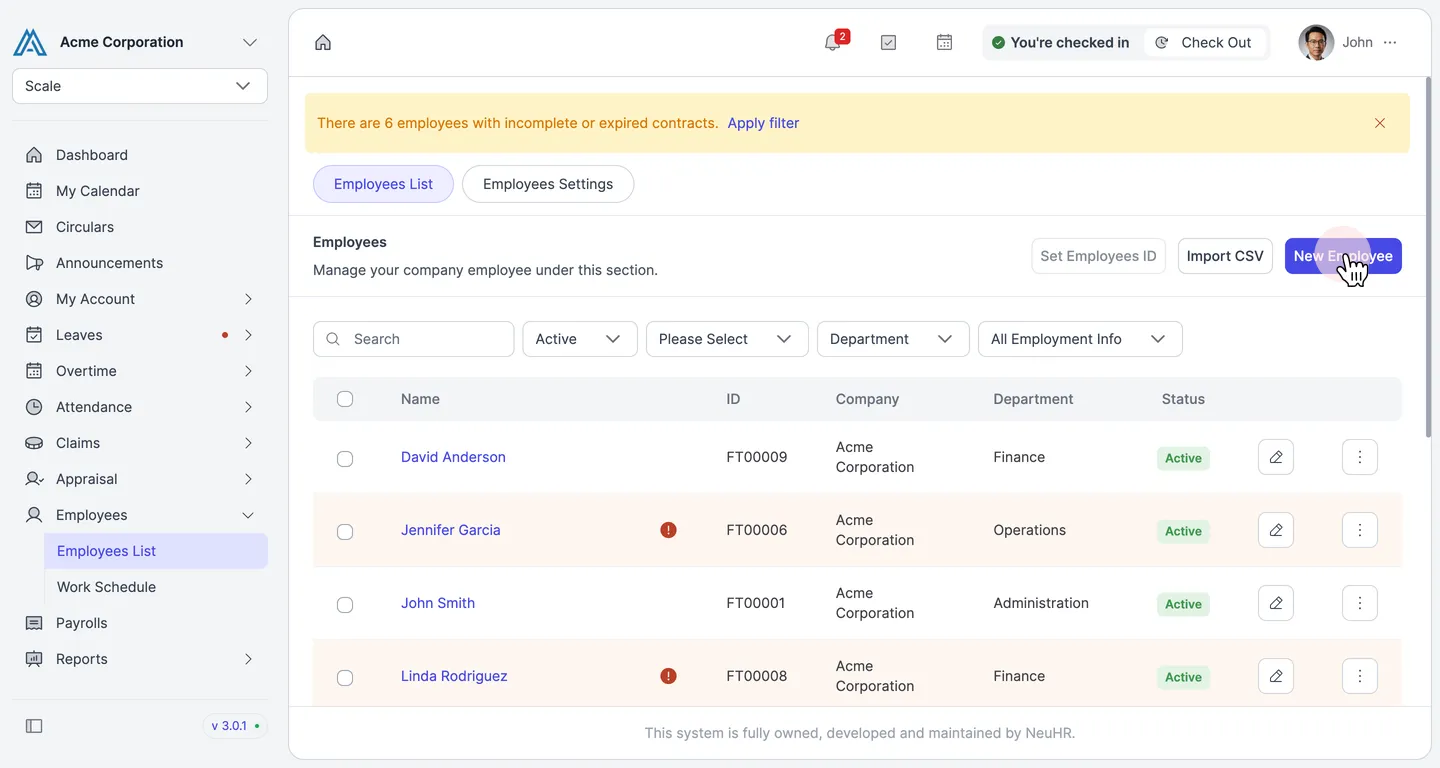
Section titled “Navigate to New Employee”In the left sidebar, click Employees, then select Employees List. On the Employees page, click the New Employee button in the top-right area.
-
Fill in the Header Fields
Section titled “Fill in the Header Fields”The top section of the form contains the core identity fields that appear on every tab. Fill in all fields before switching tabs.

Field Description First NameEmployee’s first name Last NameEmployee’s last name CompanyThe company this employee belongs to DepartmentThe department the employee is assigned to Job TitleThe employee’s job title Placement TypeEmployment classification (e.g. Full Time, Part Time, Contract) Employee IDAuto-generated. You can override it if needed EmailThe employee’s work email address — used for login -
Fill in the Personal Details tab
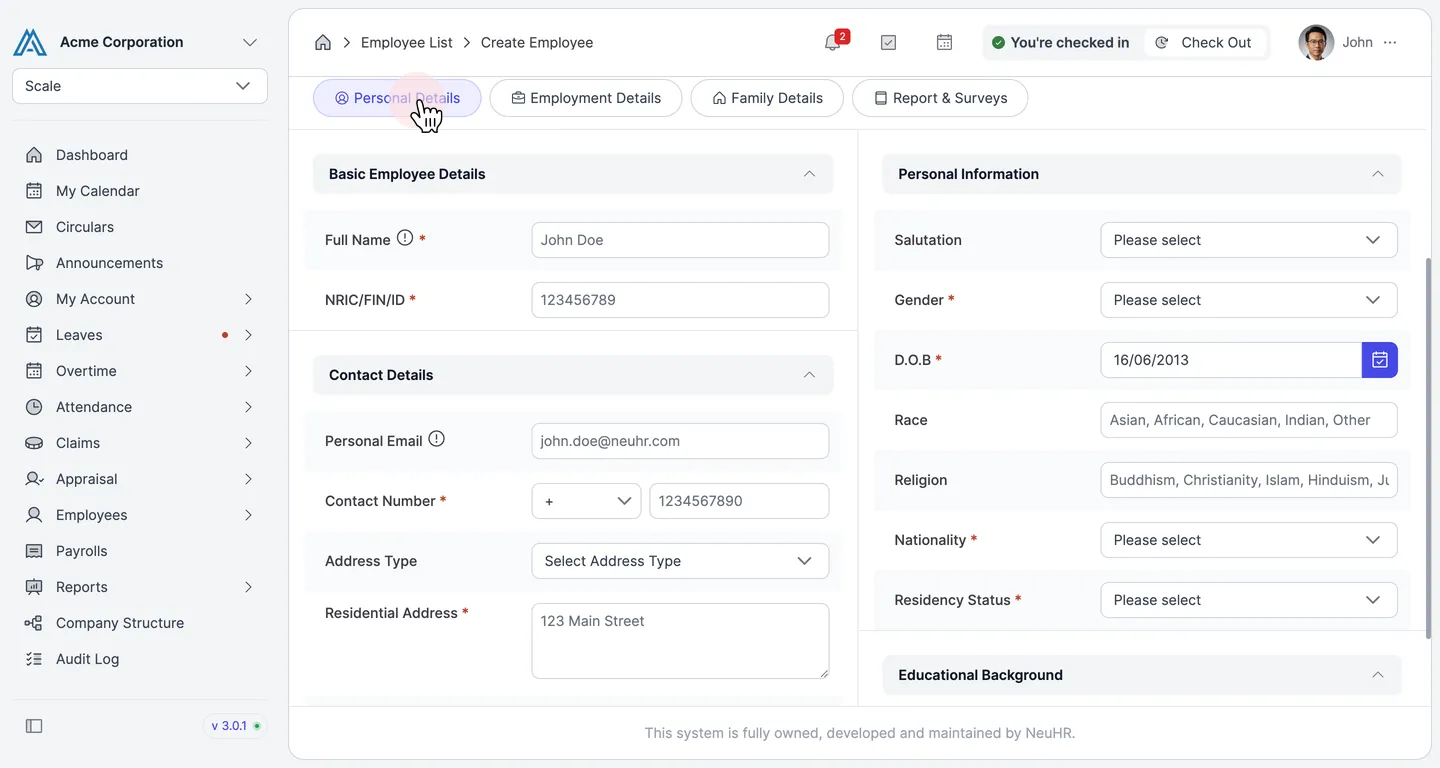
Section titled “Fill in the Personal Details tab”Click the Personal Details tab. This tab covers identity, contact, and personal information.
Basic Employee Details
Section titled “Basic Employee Details”Field Description Full Name*The employee’s full legal name NRIC/FIN/ID*National identification number (must be unique) Contact Details
Section titled “Contact Details”Field Description Personal EmailPersonal (non-work) email address Contact Number*Primary phone number, including country code Address TypeType of residential address (e.g. HDB, Private) Residential Address*Full street address Postal CodePostcode or ZIP code CountryCountry of residence Personal Information
Section titled “Personal Information”Field Description SalutationTitle (e.g. Mr, Ms, Dr) Gender*Male / Female / Other D.O.B*Date of birth RaceEmployee’s racial background ReligionEmployee’s religion Nationality*Nationality Residency Status*Citizenship or residency type (e.g. Citizen, PR, Work Pass) Educational Background
Section titled “Educational Background”Field Description Highest QualificationHighest level of education attained -
Fill in the Employment Details tab — Basic & Payroll
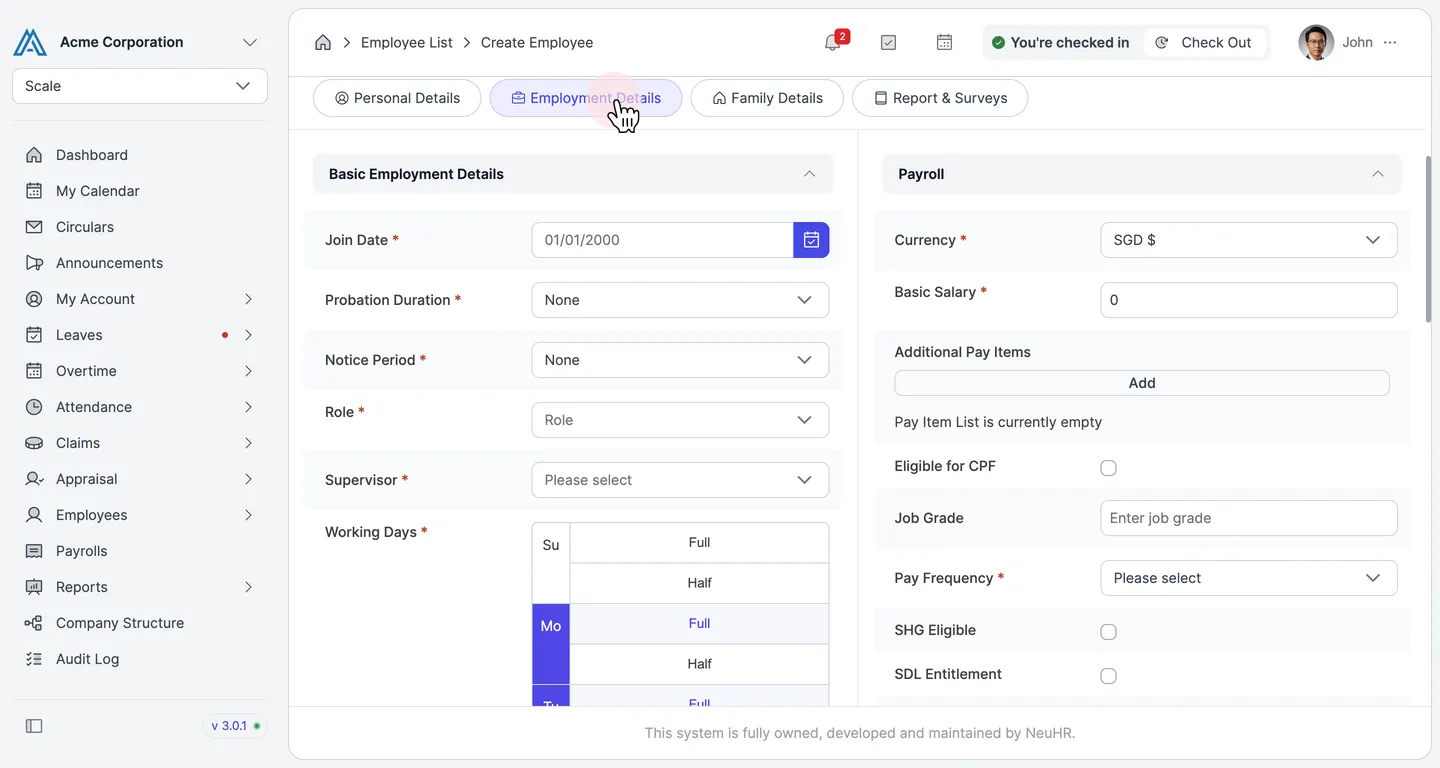
Section titled “Fill in the Employment Details tab — Basic & Payroll”Click the Employment Details tab. This tab contains employment terms and payroll settings.
Basic Employment Details
Section titled “Basic Employment Details”Field Description Join Date*The employee’s official start date Probation Duration*Length of the probation period (or None) Notice Period*Required notice period (or None) Role*System role assigned to this employee (e.g. Employee, Supervisor) Supervisor*The employee’s direct reporting manager Working Days*Days of the week the employee works — select Full or Half for each day Payroll
Section titled “Payroll”Field Description Currency*Salary currency (e.g. SGD, MYR) Basic Salary*Monthly basic salary amount Additional Pay ItemsOptional pay items added on top of basic salary Eligible for CPFCheck if the employee is eligible for CPF contributions (Singapore) Job GradeInternal grade or band Pay Frequency*How often the employee is paid (e.g. Monthly) SHG EligibleEligible for Self-Help Group fund deduction SDL EntitlementSubject to Skills Development Levy Bank NameEmployee’s bank name for salary payment Account TypeSavings or current account Account NumberBank account number Account Holder NameName as it appears on the bank account -
Fill in the Employment Details tab — Benefits, Claims & Other Terms
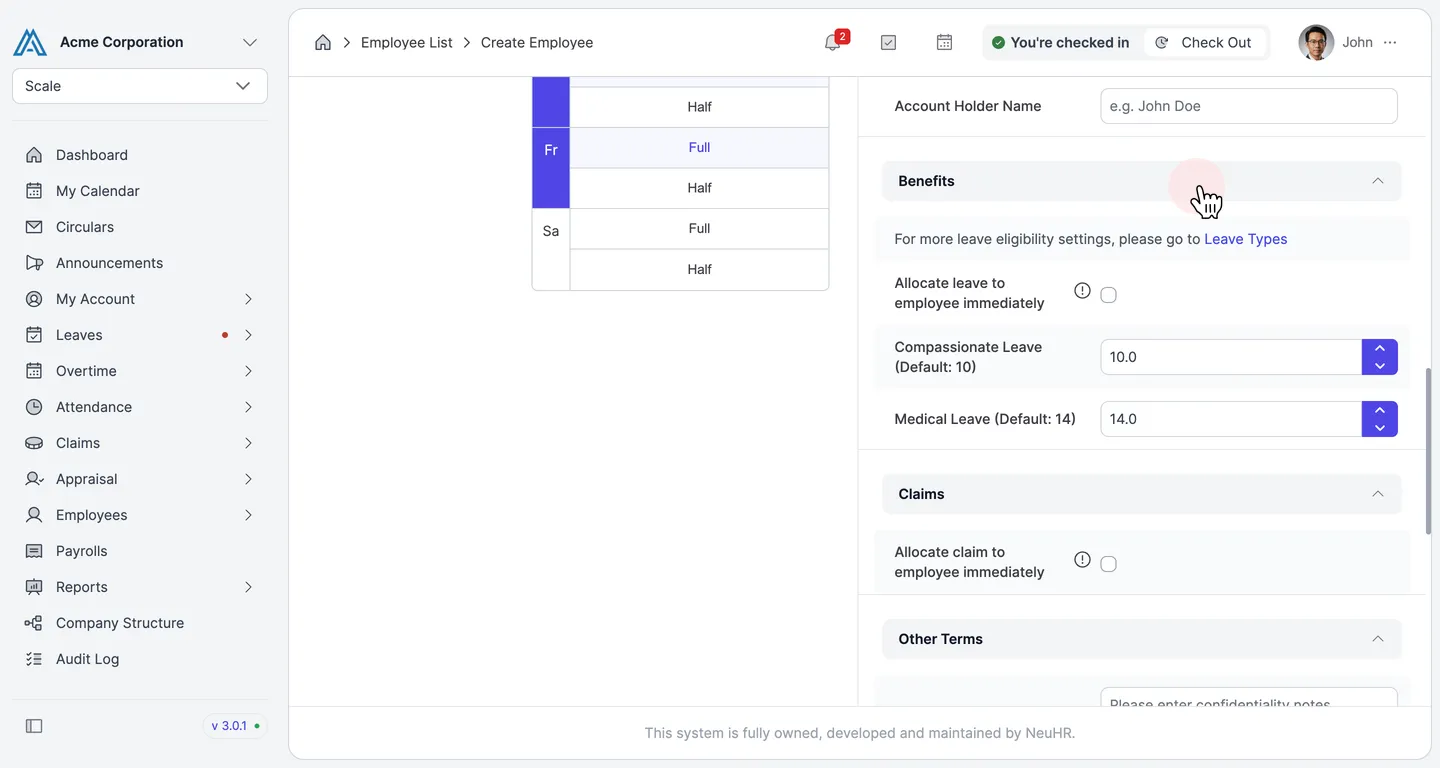
Section titled “Fill in the Employment Details tab — Benefits, Claims & Other Terms”Scroll down to complete the remaining sections of the Employment Details tab.
Benefits
Section titled “Benefits”Field Description Allocate leave to employee immediatelyToggle on to credit all leave balances as soon as the employee is created Compassionate Leave (Default: 10)Override the default compassionate leave allocation Medical Leave (Default: 14)Override the default medical leave allocation Claims
Section titled “Claims”Field Description Allocate claim to employee immediatelyToggle on to make all claim categories available as soon as the employee is created Other Terms
Section titled “Other Terms”Field Description ConfidentialityNotes on the employee’s confidentiality agreement Non-CompeteNotes on any non-compete clauses Damage CompensationNotes on damage compensation obligations CopyrightNotes on intellectual property or copyright agreements -
Fill in the Family Details tab
Section titled “Fill in the Family Details tab”Click the Family Details tab. This tab captures marital, next-of-kin, and emergency contact information.
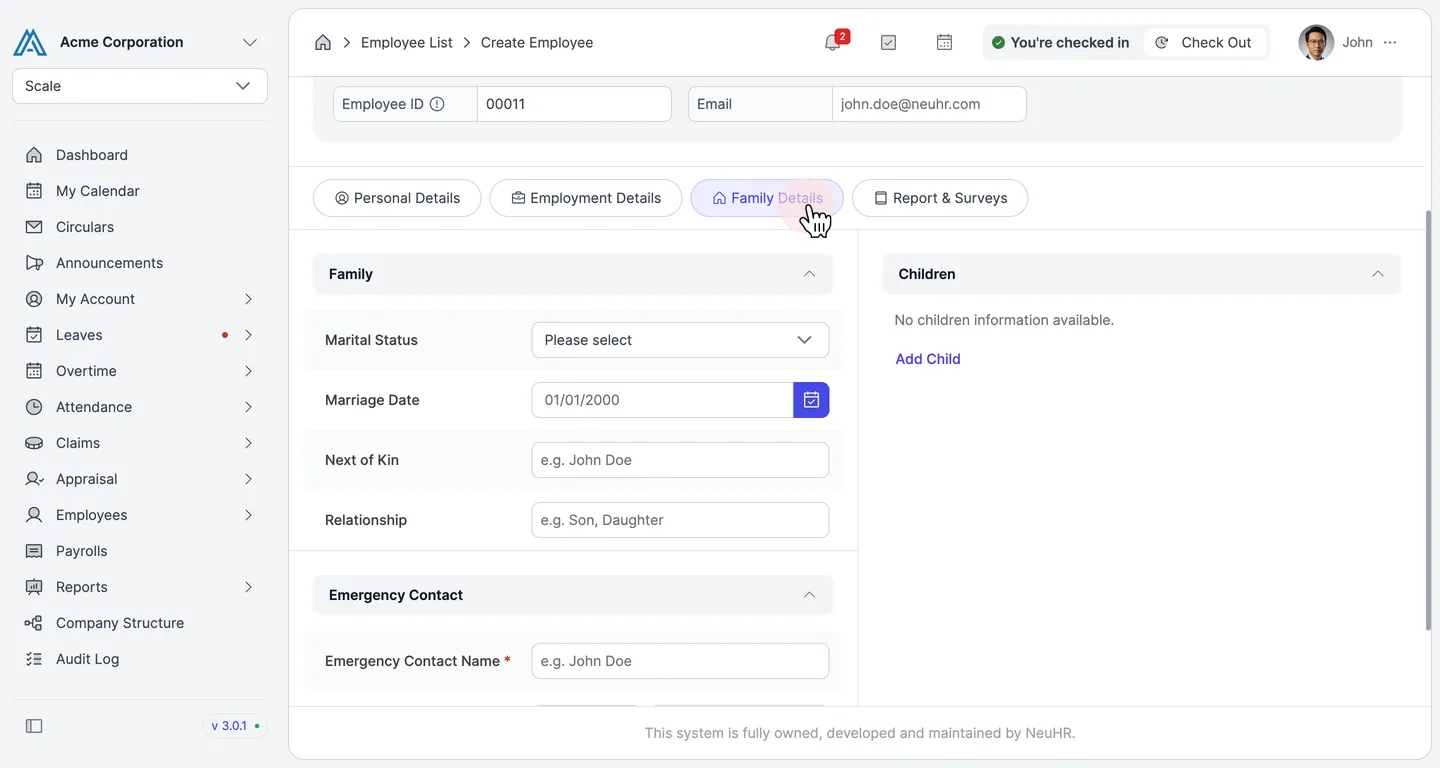
Family
Section titled “Family”Field Description Marital StatusSingle, Married, Divorced, etc. Marriage DateDate of marriage (if applicable) Next of KinName of next of kin RelationshipRelationship to the employee (e.g. Spouse, Parent) Children
Section titled “Children”Click Add Child to add details of any children.
Emergency Contact
Section titled “Emergency Contact”Field Description Emergency Contact Name*Full name of the emergency contact person -
Complete Report & Surveys, then save or publish
Section titled “Complete Report & Surveys, then save or publish”Click the Report & Surveys tab. Toggle Enable OED Submission on if this employee’s data should be submitted to MOM’s Occupational Employment Dataset (Singapore).
When you are done filling in the form, use the buttons at the top-right:

Button What it does Save DraftSaves all entered data without activating the account. The employee will not be able to log in yet. Publish UserActivates the account and sends a welcome email to the employee so they can log in.