How to Create a Leave Type
This guide will show you how to create a new leave type in NeuHR. Leave types define the different categories of leave that employees can apply for, such as annual leave, medical leave, or training leave.
Prerequisites
Section titled “Prerequisites”- You must have HR Executive or Super Admin role
- Access to the Leave Settings in the admin panel
Step 1: Navigate to Leave Settings
Section titled “Step 1: Navigate to Leave Settings”From the main dashboard, click on Settings in the left sidebar, then select Leaves from the dropdown menu.
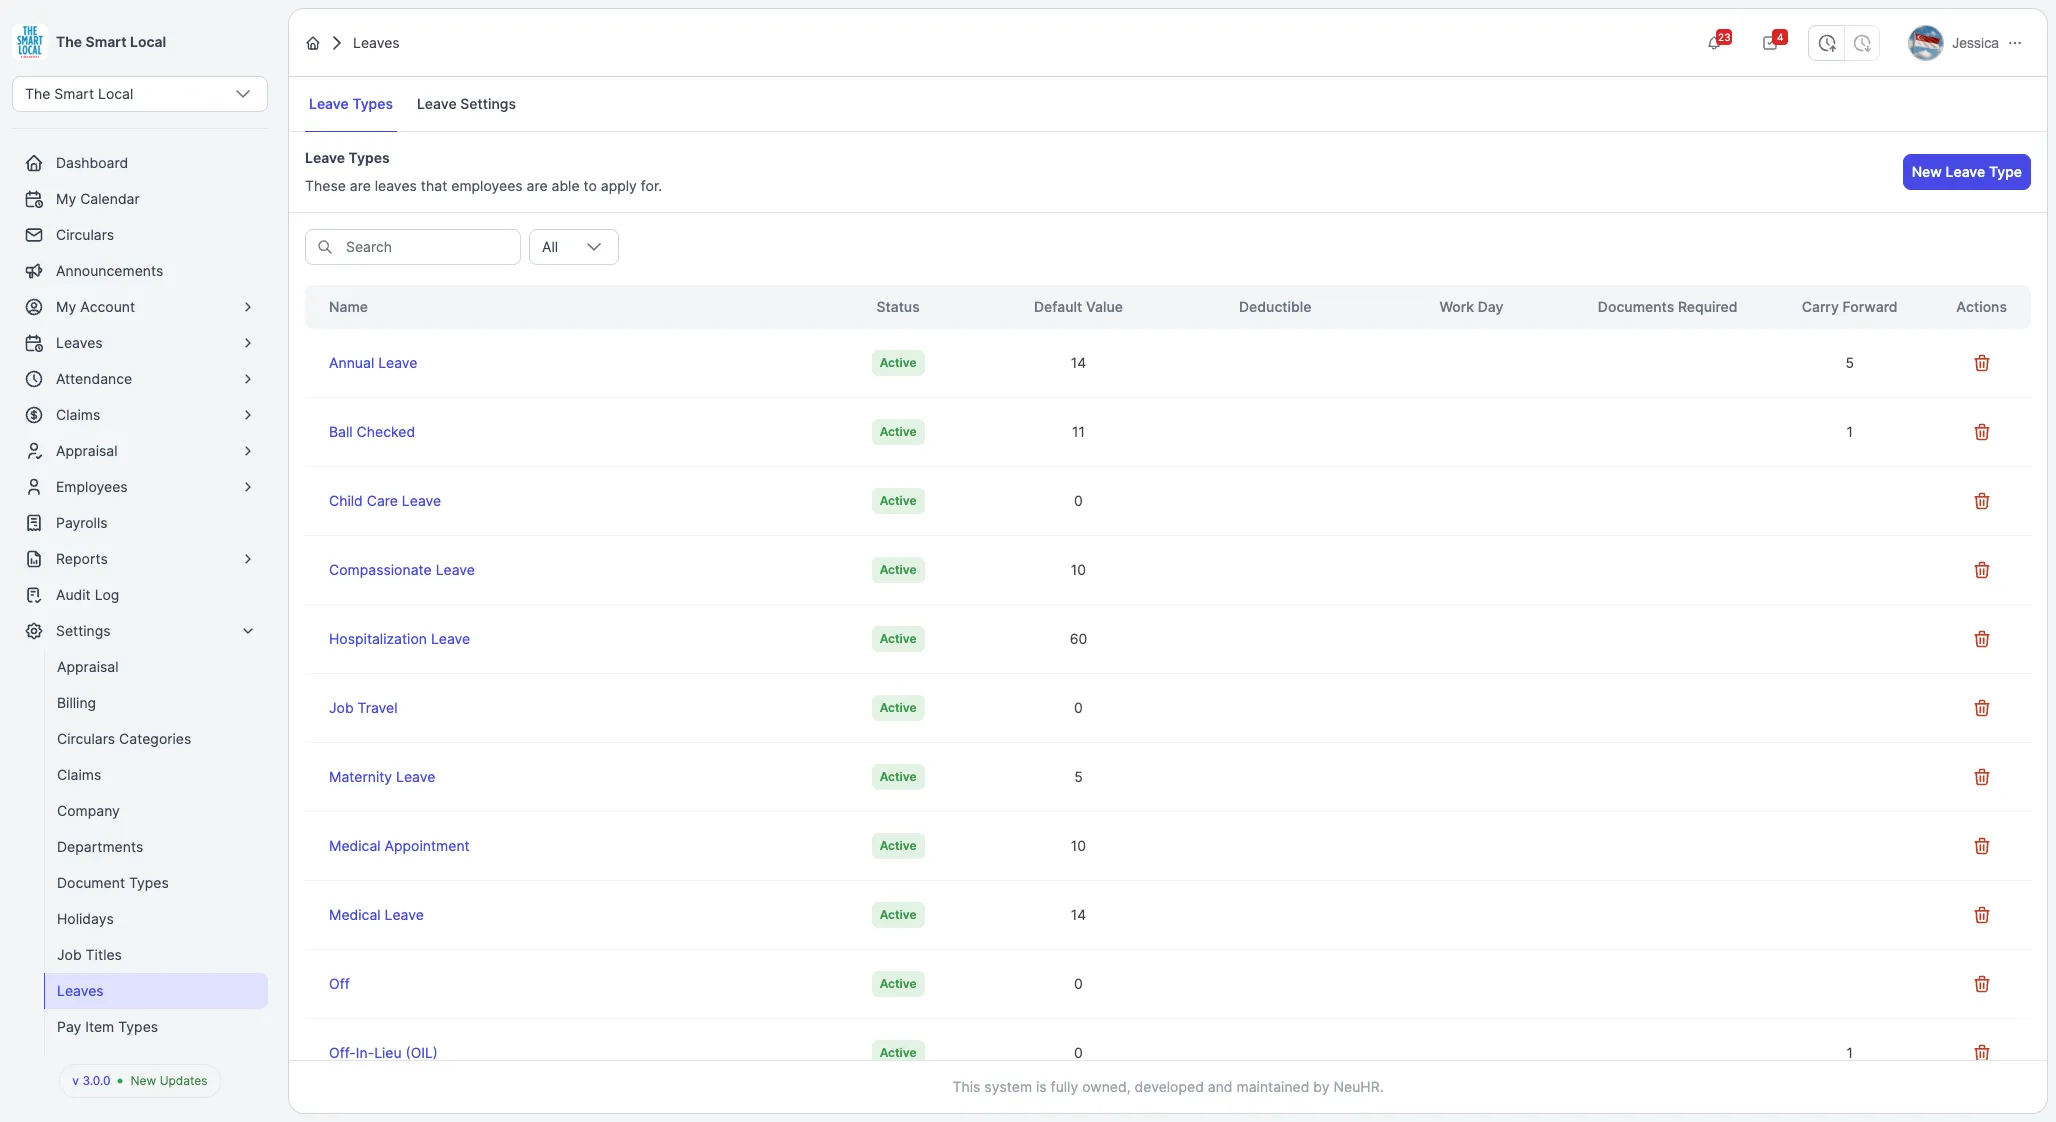
Step 2: Click New Leave Type Button
Section titled “Step 2: Click New Leave Type Button”On the Leave Types page, click the New Leave Type button located in the top right corner of the page.
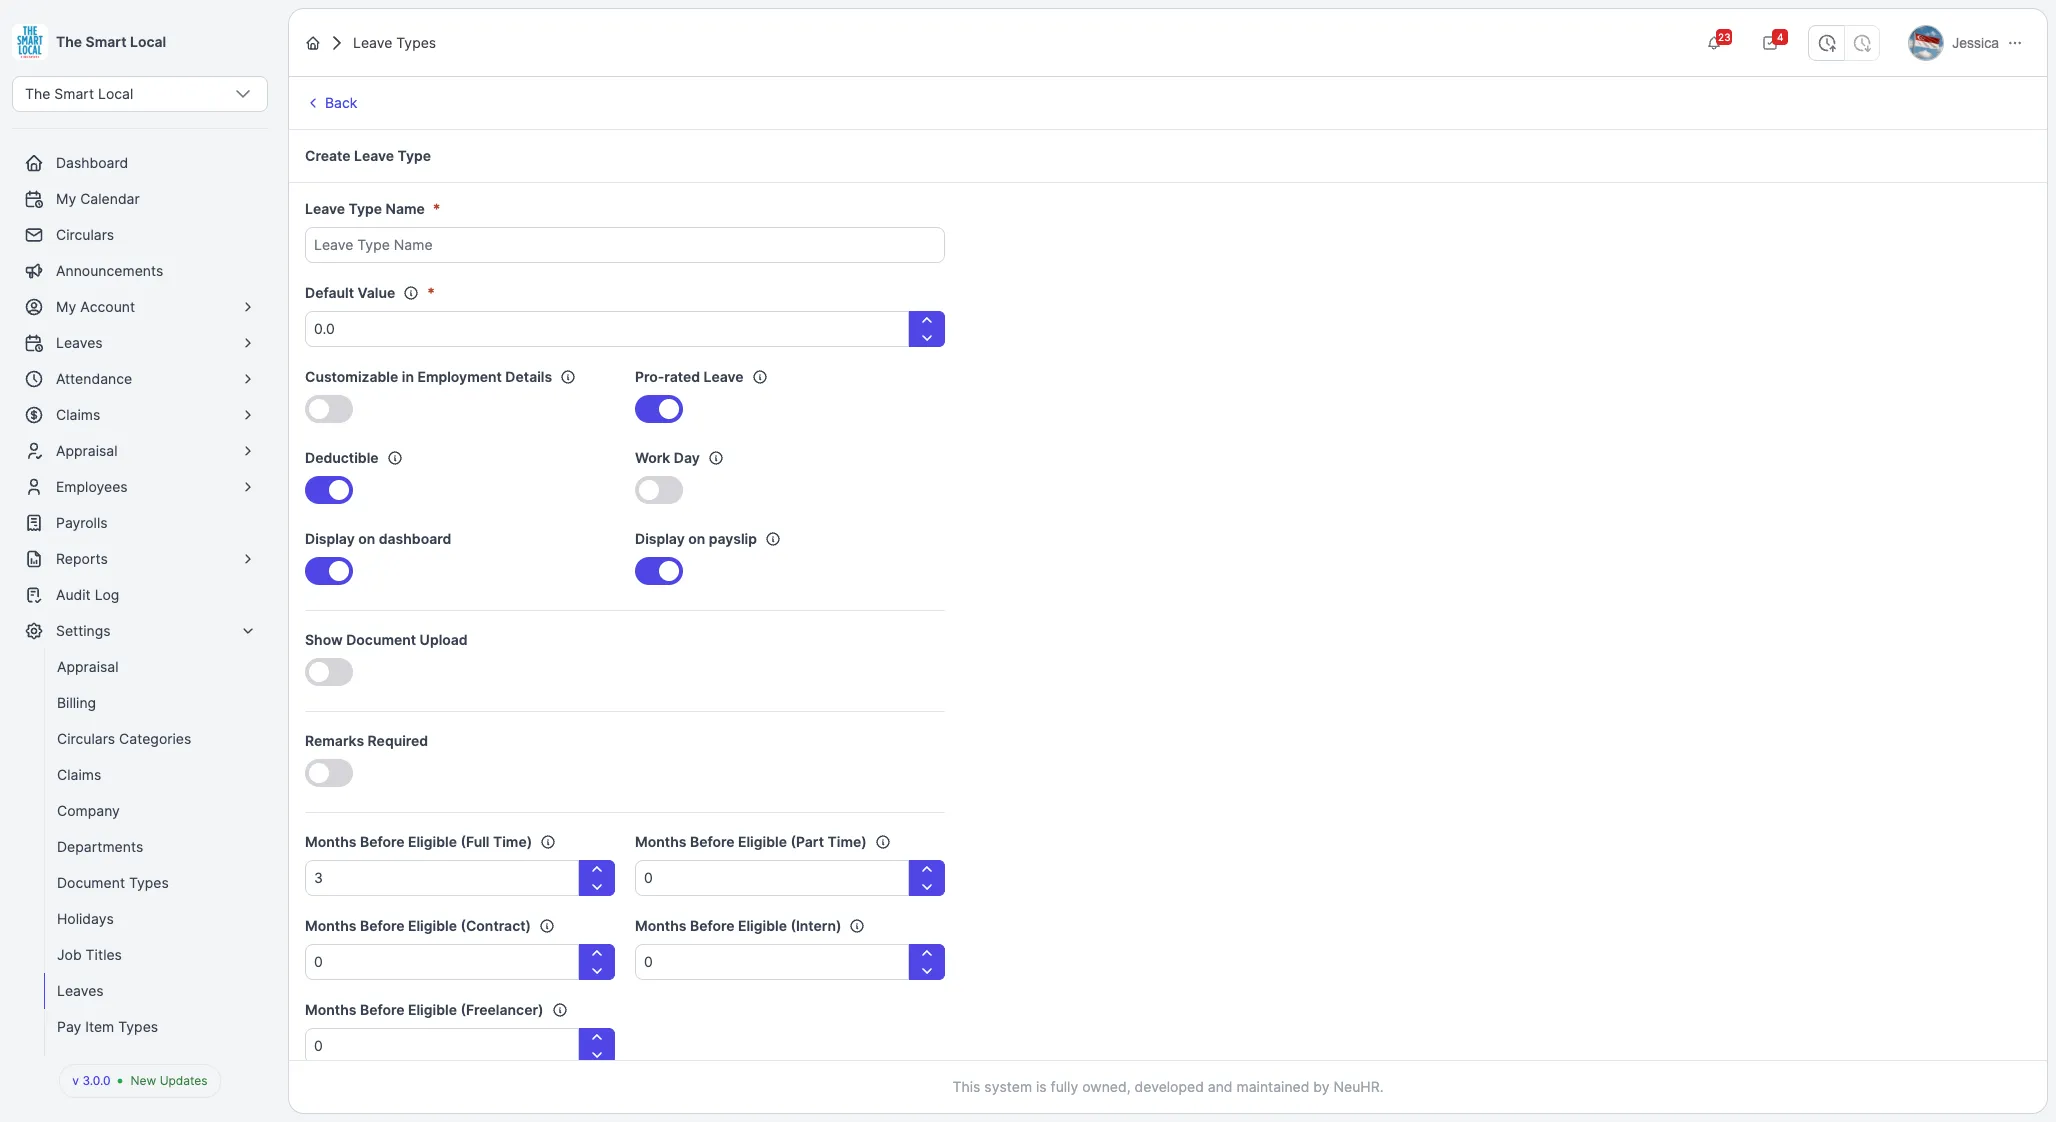
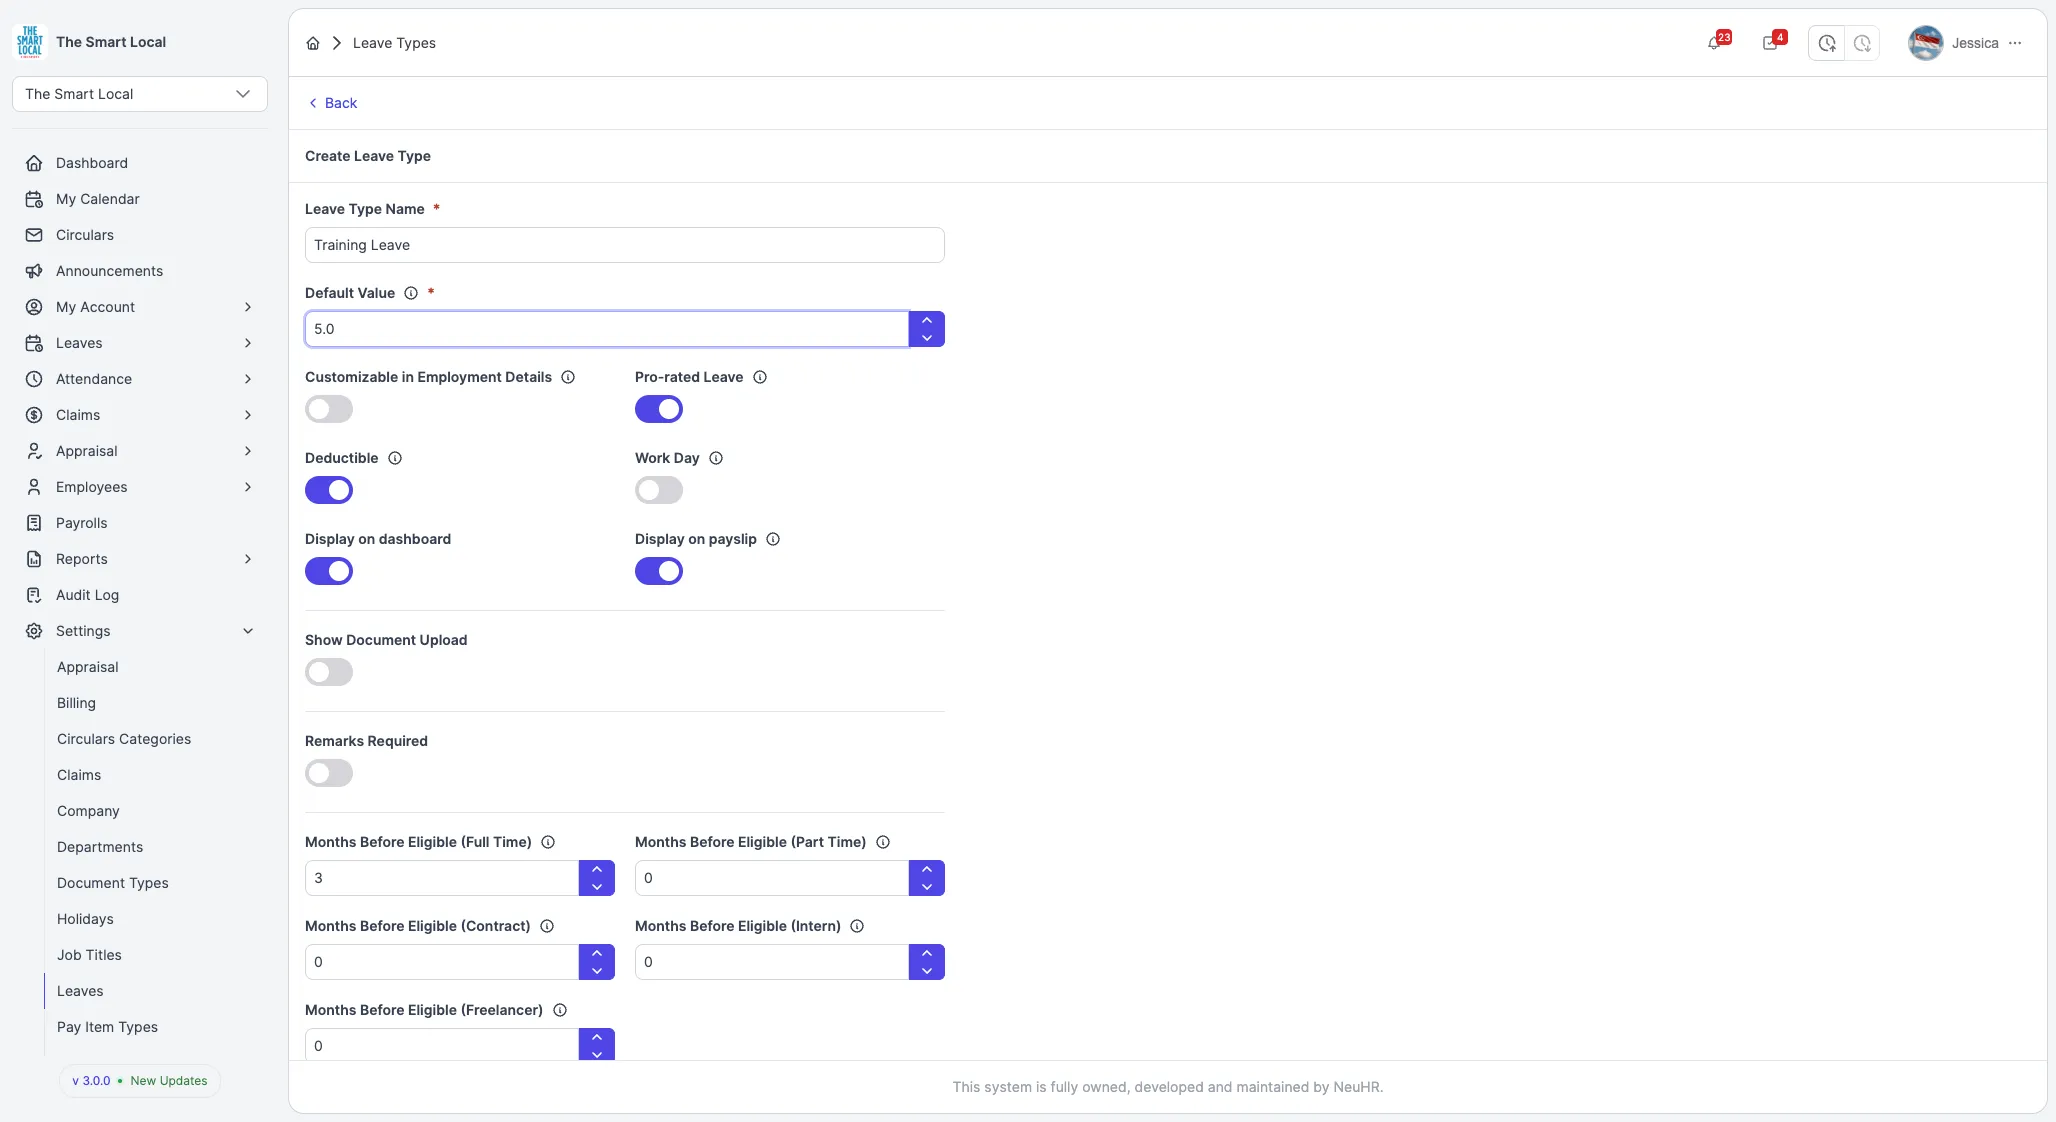
Step 3: Fill in Leave Type Details
Section titled “Step 3: Fill in Leave Type Details”Enter the following information in the leave type form:
Required Fields
Section titled “Required Fields”- Leave Type Name: A clear, descriptive name for the leave type (e.g., “Training Leave”, “Study Leave”)
- Default Value: The default number of days allocated for this leave type
Optional Settings
Section titled “Optional Settings”- Customizable in Employment Details: Toggle to allow customization per employee
- Pro-rated Leave: Toggle to enable pro-rating based on employment duration (enabled by default)
- Deductible: Toggle to make this leave deductible from employee balance (enabled by default)
- Work Day: Toggle to count only working days
- Display on dashboard: Toggle to show this leave type on the employee dashboard (enabled by default)
- Display on payslip: Toggle to display on employee payslips (enabled by default)
- Show Document Upload: Toggle to require document uploads when applying
- Remarks Required: Toggle to make remarks mandatory when applying
Eligibility Settings
Section titled “Eligibility Settings”Configure the waiting period (in months) before employees can use this leave type based on employment type:
- Months Before Eligible (Full Time): Default is 3 months
- Months Before Eligible (Part Time): Default is 0 months
- Months Before Eligible (Contract): Default is 0 months
- Months Before Eligible (Intern): Default is 0 months
- Months Before Eligible (Freelancer): Default is 0 months
Additional Options
Section titled “Additional Options”- Credit Leave Upon Join Date: Toggle to credit leave immediately when employee joins
- Bring Forward: Toggle to allow carrying forward unused leave to next year
- Enable Yearly Increment: Toggle to enable annual leave increment
- Status: Select Active or Inactive
Step 4: Create Leave Type
Section titled “Step 4: Create Leave Type”Once you’ve reviewed all details, click the Create button at the bottom of the form.
The system will redirect you back to the Leave Types page and display a success message confirming that your leave type has been created. The new leave type will now appear in the list and be available for employees to apply for.
